Introduction
The all new Slick for use with ITCH 2 is just released. The user-application has gone through a major change, now focusing primarily on the vessel and the cleaning operation. It features greatly improved tracking of operations and data-handling compared to previous versions. New usage-flows have been designed, to ensure successful cleaning operations using ITCH and promoting simplicity of use for the crew and onshore personnel.
Slick is only compatible with ITCH 2.
This manual explains the basic usage and more details about the Slick application.
Help Center
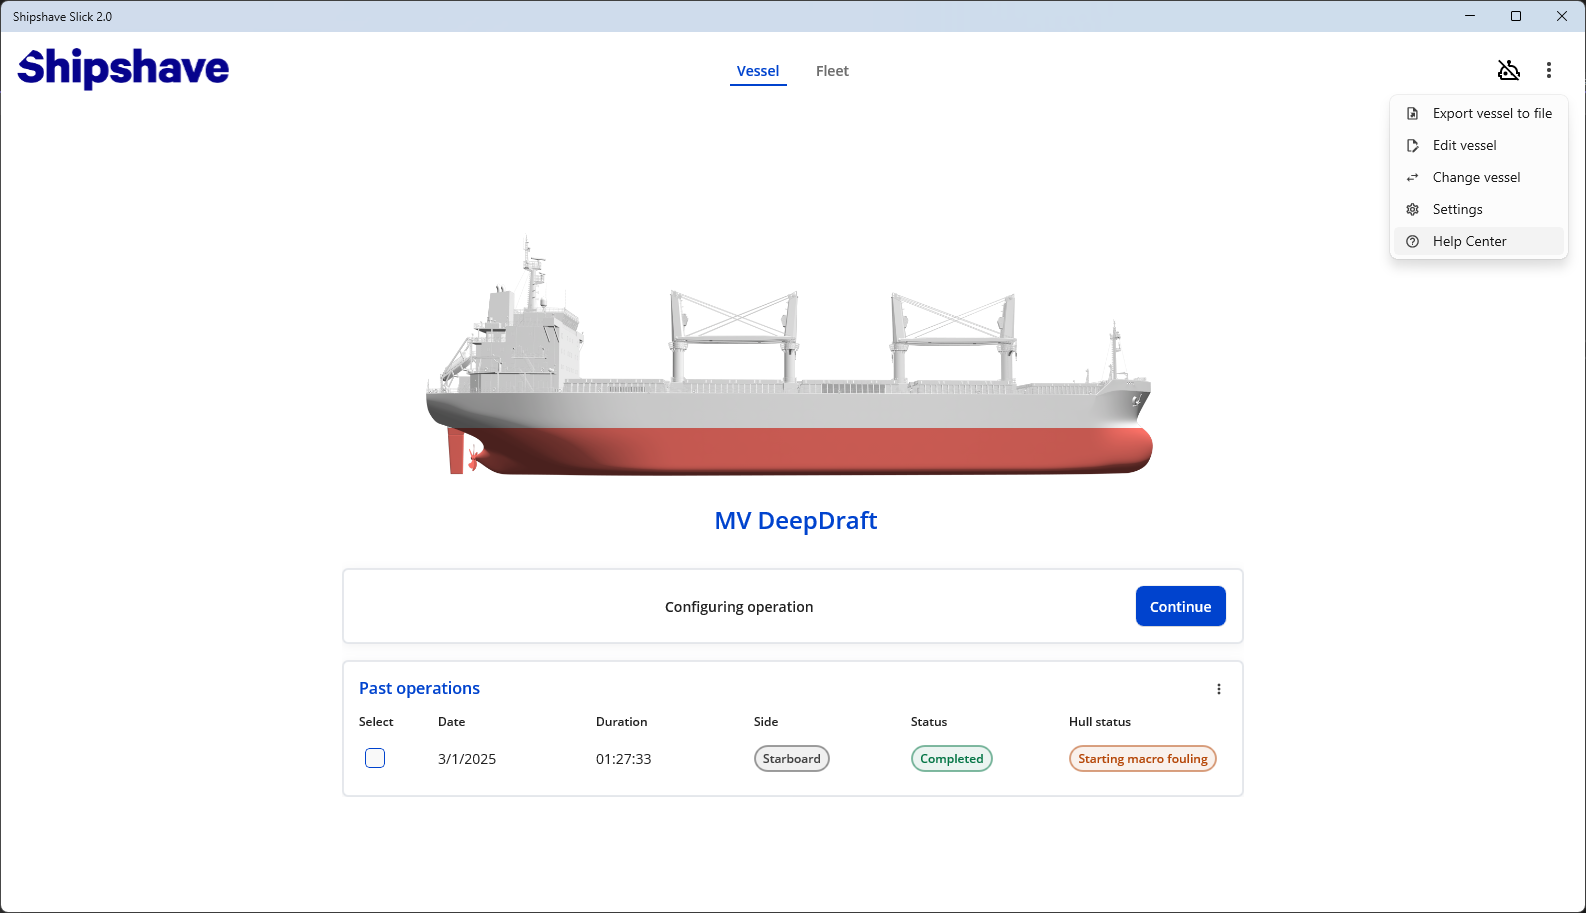
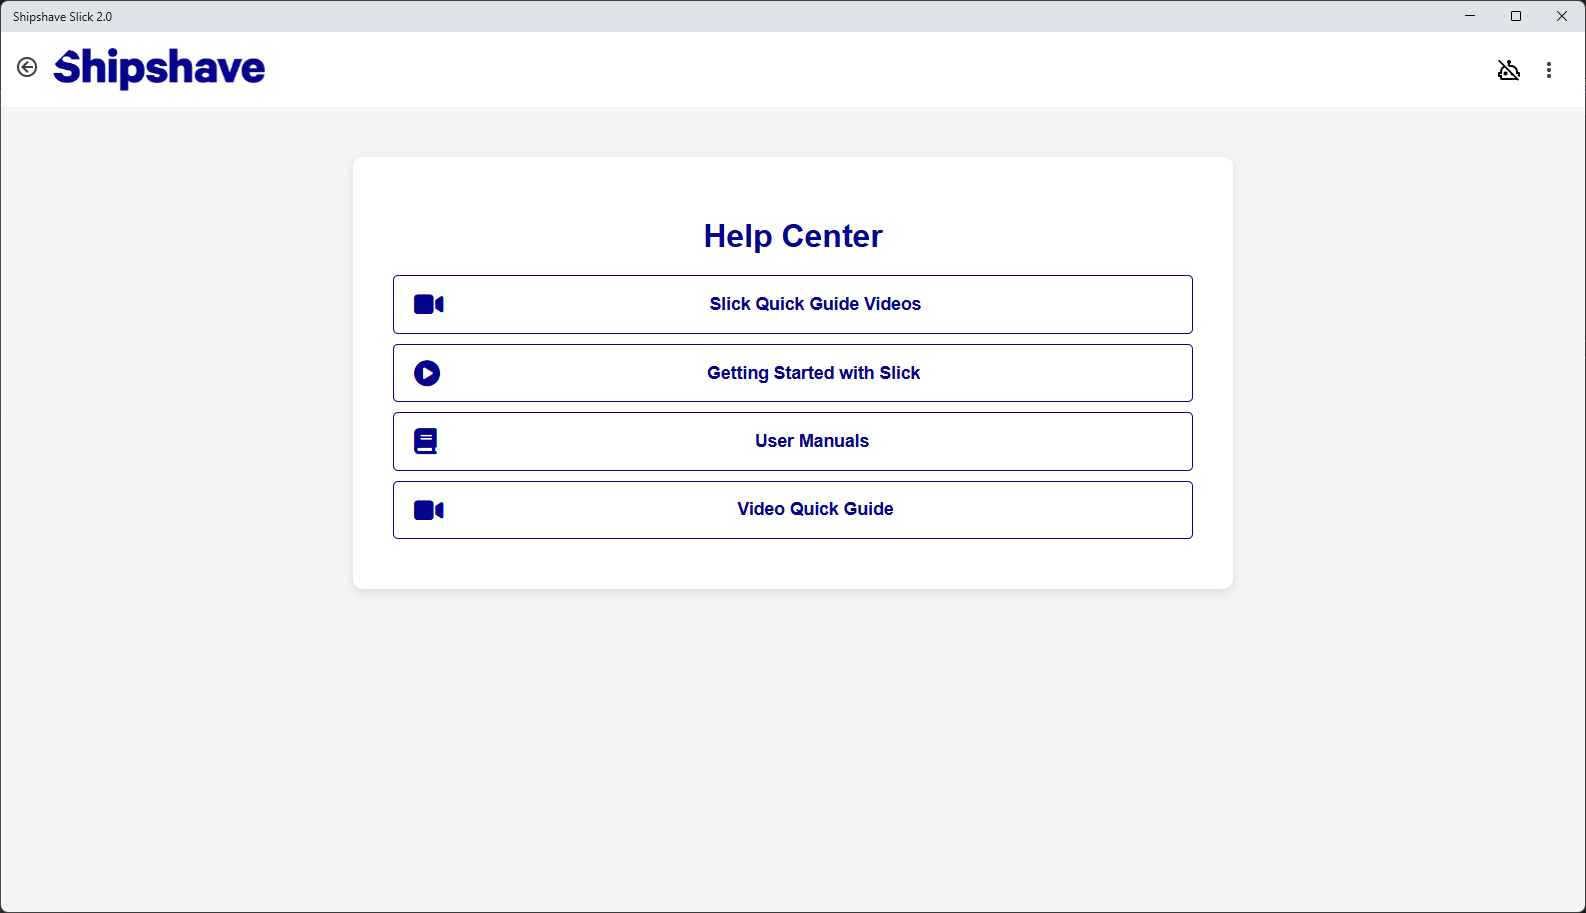
Slick v2 now includes and embedded "Help Center". Here you can find all relevant user manuals, videos and documentation with information about all Shipshave products. This documentation is always available, even without an internet connection.
The Help Center is available from every page in Slick through the context menu in the top right corner.
ITCH robot changes
Slick v2 comes bundled with a new firmware package for the ITCH. In order to successfully use Slick with ITCH, the firmware must be upgraded. See Firmware Update section for details.
The new firmware has several changes and improvements, but the most notable for the user is described below.
Mission Plan
The ITCH needs a mission plan prior to each operation. This is generated by Slick during the Cleaning-Operation Wizard stages, and uploaded to the ITCH when "Begin Operation" is pressed.
If the ITCH does not have a valid mission plan, the LED light pulses purple. When a valid mission plan is uploaded, the LED light changes to solid green.
The ITCH can be powered off after a mission plan is uploaded, it remembers the mission plan over power-cycles.
If the ITCH starts up and goes directly to solid green, it means a valid mission plan exists in ITCH memory and the ITCH is ready to start cleaning operations.
Once an operation completes, the ITCH will start blinking blue (processing). This might take some time (several minutes). After this, the ITCH will go back to pulsing purple and a new mission plan must be uploaded to start a new operation.
LED Codes
The LED codes that describes the state of the ITCH has changed. The following applies for firmware versions compatible with Slick 2.0 (Camera FW >= v2.1.4, Control FW >= v3.1.5)
| LED Code | ITCH State | Comment |
|---|---|---|
| Blinking green | Startup | ITCH is starting up and doing initial checks. Rudder will move |
| Pulsing purple | Waiting | ITCH has started and is waiting for a mission plan |
| Solid green | Ready | ITCH has valid mission plan and is ready for operation |
| (Off) | In operation | ITCH is submerged and performing cleaning operation |
| Blinking blue | Processing | ITCH has surfaced and is processing the data gathered during the cleaning operation |
| Solid blue | Update mode | ITCH is ready to receive new firmware. Hold push-button in "On" position for >5sec during power-on to enter this state |
| Pulsing yellow | Charging | ITCH is charging |
| Solid yellow | Fully charged | ITCH is fully charged (only when charger is plugged in) |
| Blinking red | Low battery | ITCH is low on battery. Will shut down after 1 min. |
| Solid red | Error mode | ITCH has detected a system error. Connect to Slick |
Initial setup
Video tutorial
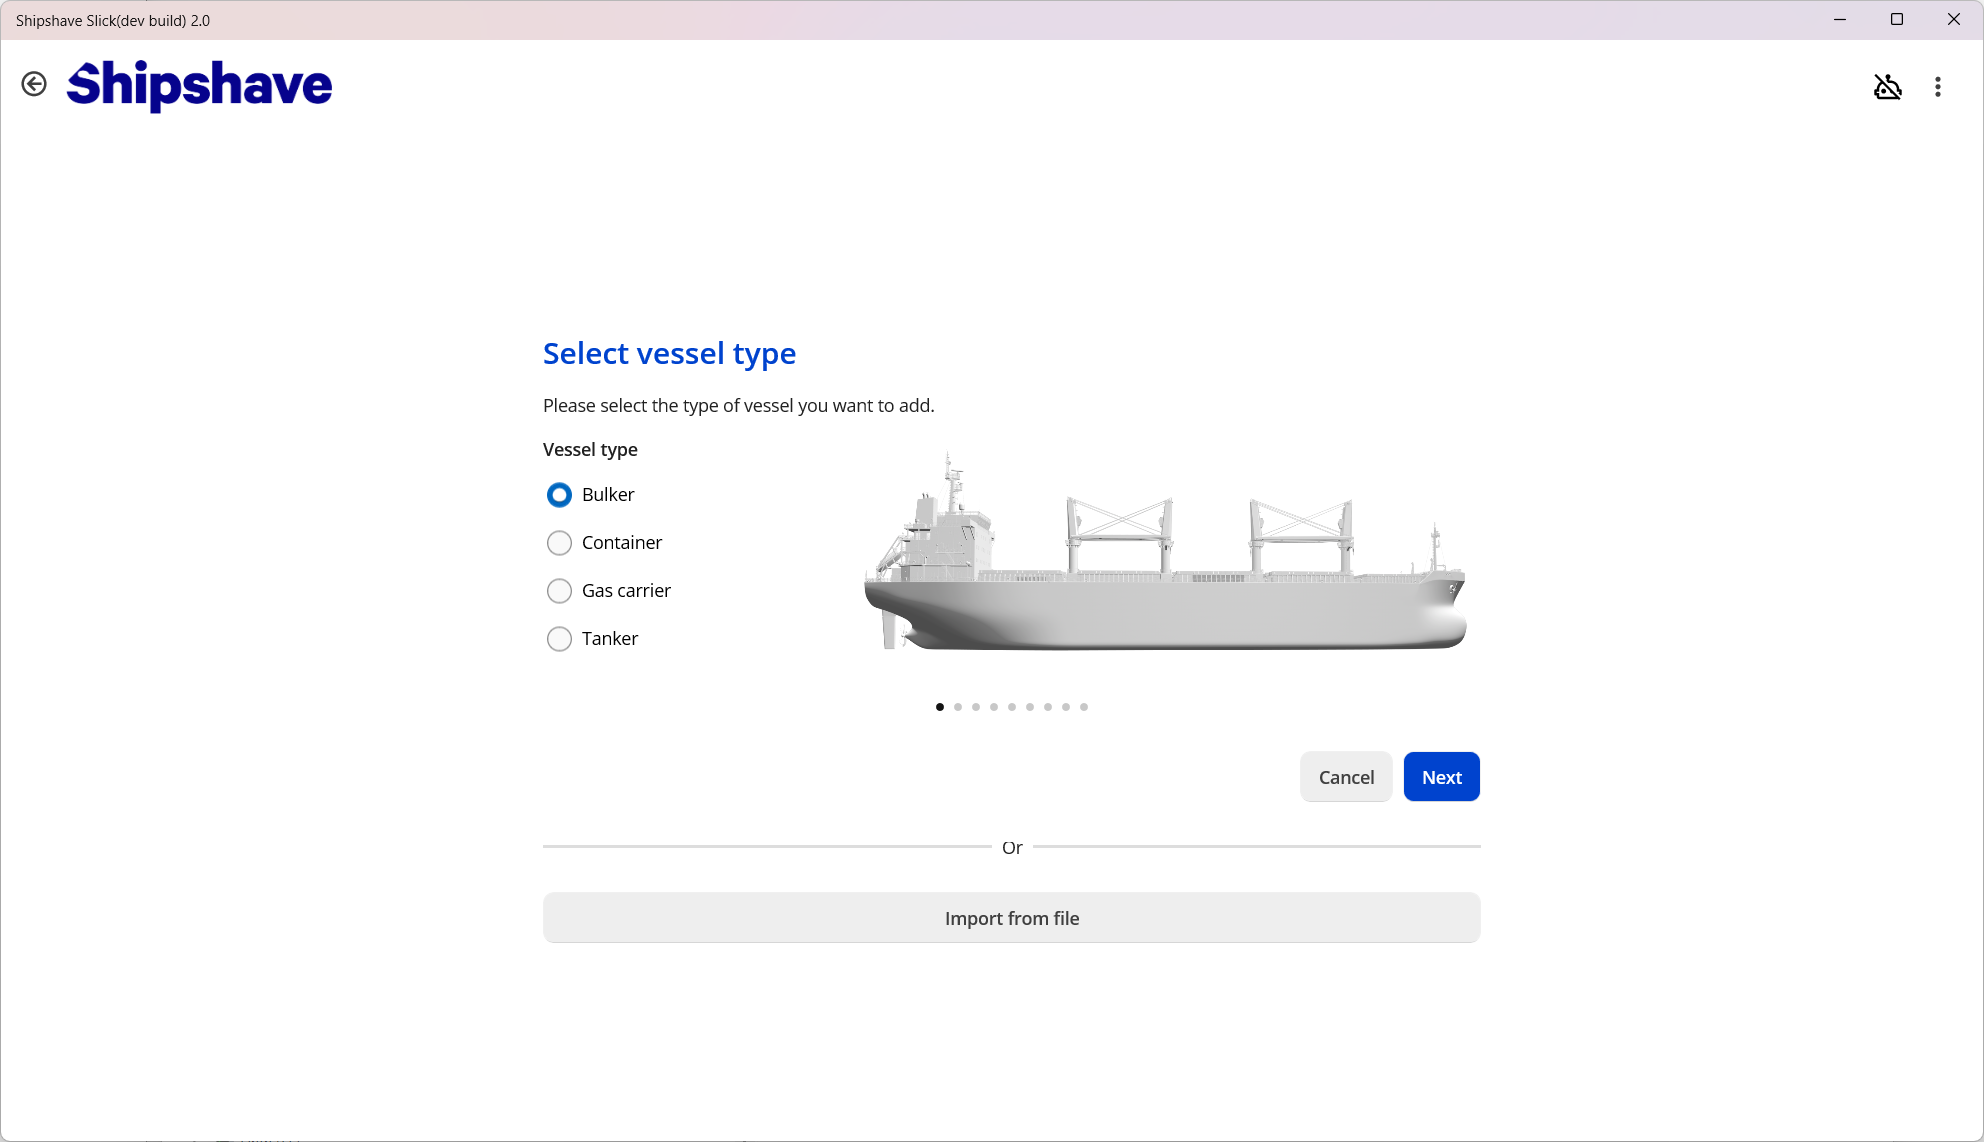
When opening the application for the first time, the user is prompted with a wizard for setting up the vessel that ITCH will operate on. The user can also import a vessel from file, such that e.g. managers onshore can set up the vessel and share the configuration with the respective crews. The details needed for setting up the vessel are:
- Vessel type
- Vessel name
- Vessel IMO
- Vessel overall length
- ITCH operating distance
- Height from forecastle to keel/baseline
- Vessel maximum draft
- Distance from keel/baseline to bilge keel
- The radius of the bilge-keel at midships
- Vessel overall width
The parameters are used for configuring the ITCH for a cleaning operation with minimal input from the user. The vessel is configured once, and the parameters are stored in the system. A vessel can be edited later, if parameters were incorrectly entered.
Vessel home
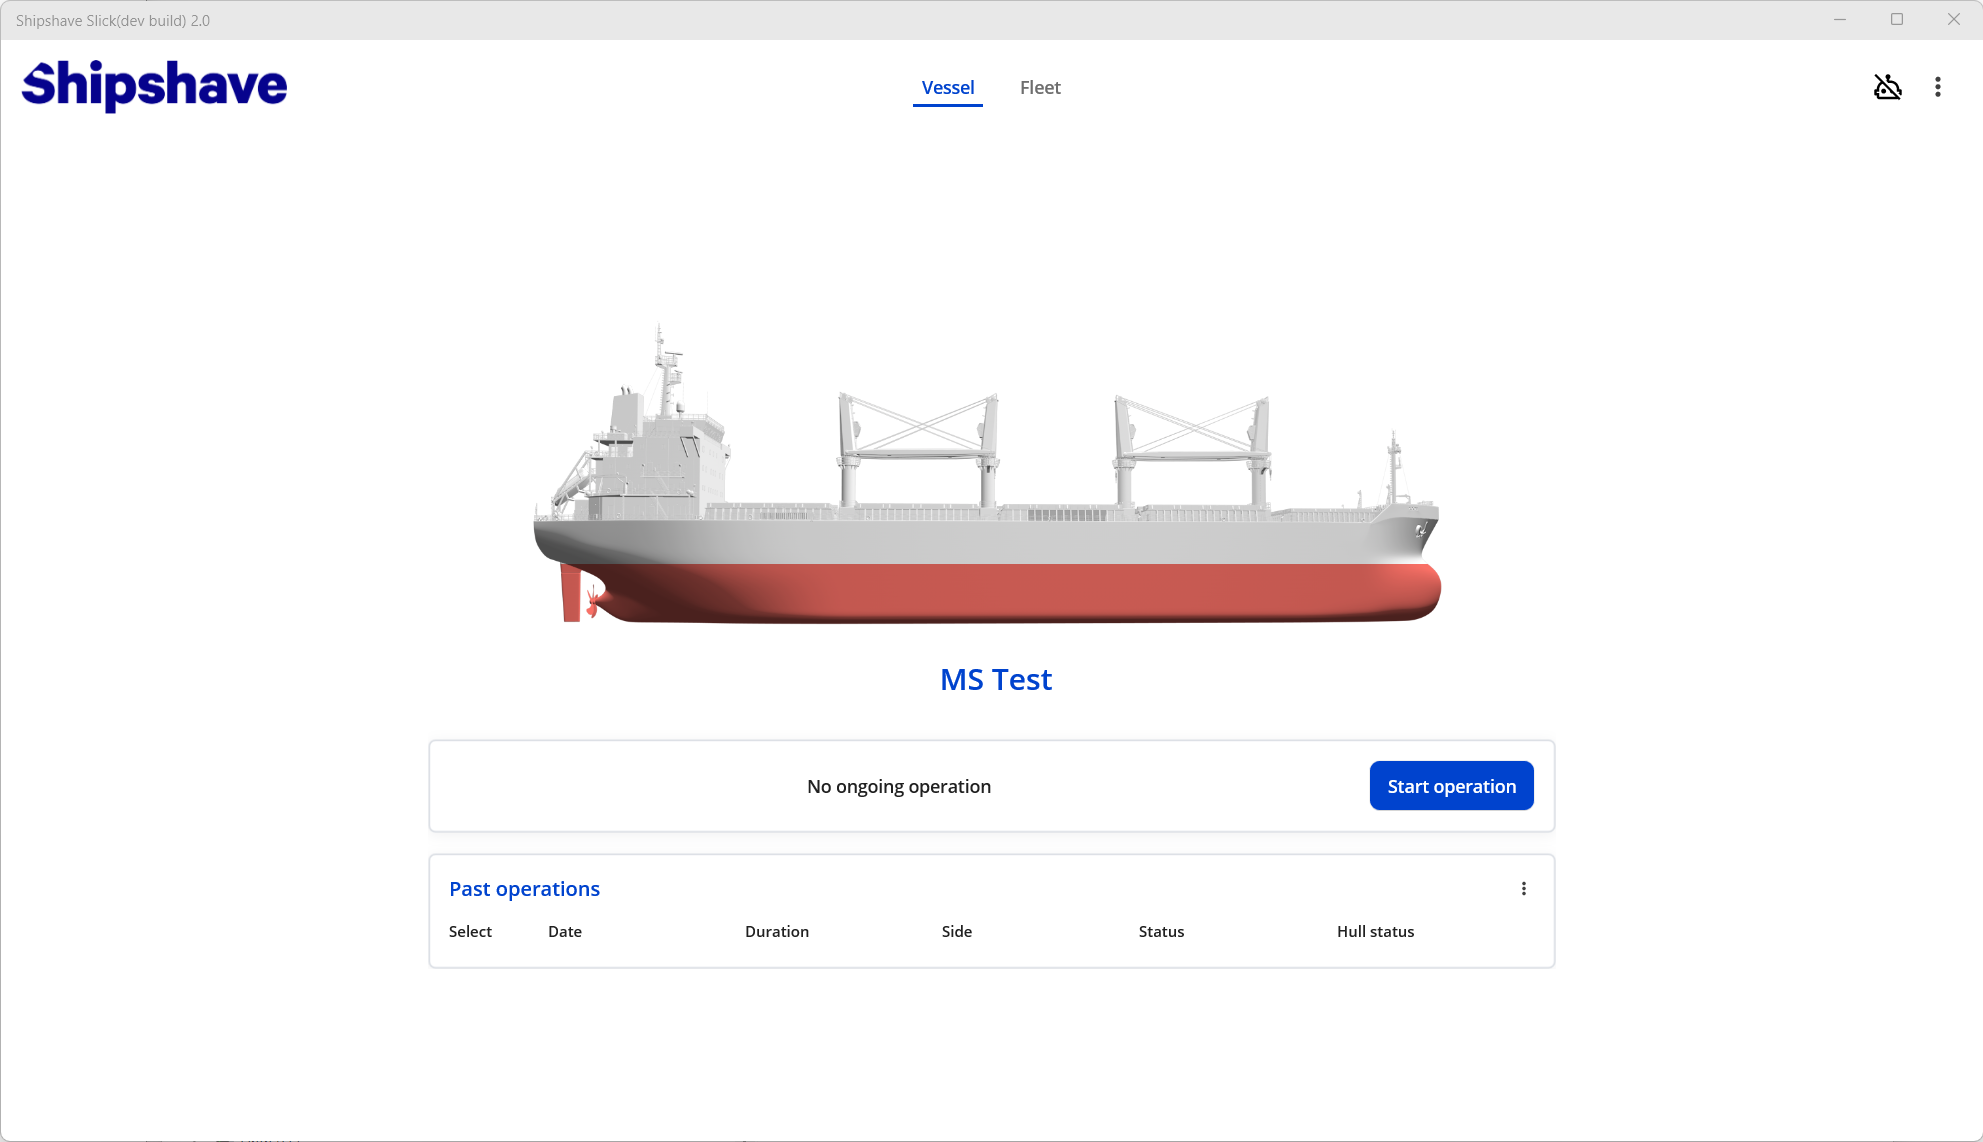
Once a vessel has been set up, the user is taken to the vessel home page. From here, the user can configure a new operation (to start using ITCH on the vessel).
The latest historical operations on the specific vessel will also be listed here, as the user builds the cleaning operation history on the vessel. There are other actions that can be performed on this page as well, such as:
- Export vessel to file
- Edit the vessel
- Change the current vessel to a different vessel in the fleet.
- Export a cleaning operation from the current vessel. This will generate a ".slickcleaning" file.
- Generate a PDF report of a cleaning operation from the current vessel.
Cleaning Operation Wizard
Video tutorials
From the vessel home page, the user can initiate a new cleaning operation. This will put the user in the cleaning operation wizard, a step-by-step guide for performing the cleaning operation and preserving the associated data. This is triggered by pressing the "Start operation" button in the vessel home page.
Pre-operation setup

Once the "Start operation" button is pressed, the user is put in the pre-operation setup stage. Here, some information about the current loading- and sailing conditions must be entered, for correctly configuring the ITCH for the current conditions. Based on the vessel-specific data and the information entered here, a suggestion for the attachments to configure the ITCH with will be generated. These can be overridden by simply selecting the attachments that are actually being used. The current condition details needed are:
- Planned side of cleaning operation (port or starboard)
- Expected vessel speed-over-ground during cleaning operation
- Current loading condition (fwd-, midship- and aft-draft)
- Target specific area. Allows a specific upper depth for cleaning band to be set.
- Expected sea state, based on Douglas Sea Scale
- Inspection operation. If the purpose is to do a quick data-gathering run without focusing on cleaning effect.
This will produce a suggestion for the following ITCH attachments to be used during the cleaning operations. These can be overridden by selecting another part in the drop-down.
- Brush
- Towbar
There is also a option to use previously used settings. This will auto-fill the fields mentioned above. This is done by pressing a entry in the list on the bottom of the page. This is useful in cased where for instance one are doing back-to-back cleaning operations on alternate sides, under the same conditions. Remember to change Operation side
Pre-dive checklist

Once the setup is completed, the user must go through a pre-dive checklist. Slick comes with a default checklist installed, but this can be configured to company- or vessel-specific checklists post-install. It can also be disabled entirely. Contact Shipshave for assistance in tailoring or disabling the checklist.
The user must confirm the items in the checklist before they are allowed to continue the wizard.
Operation summary
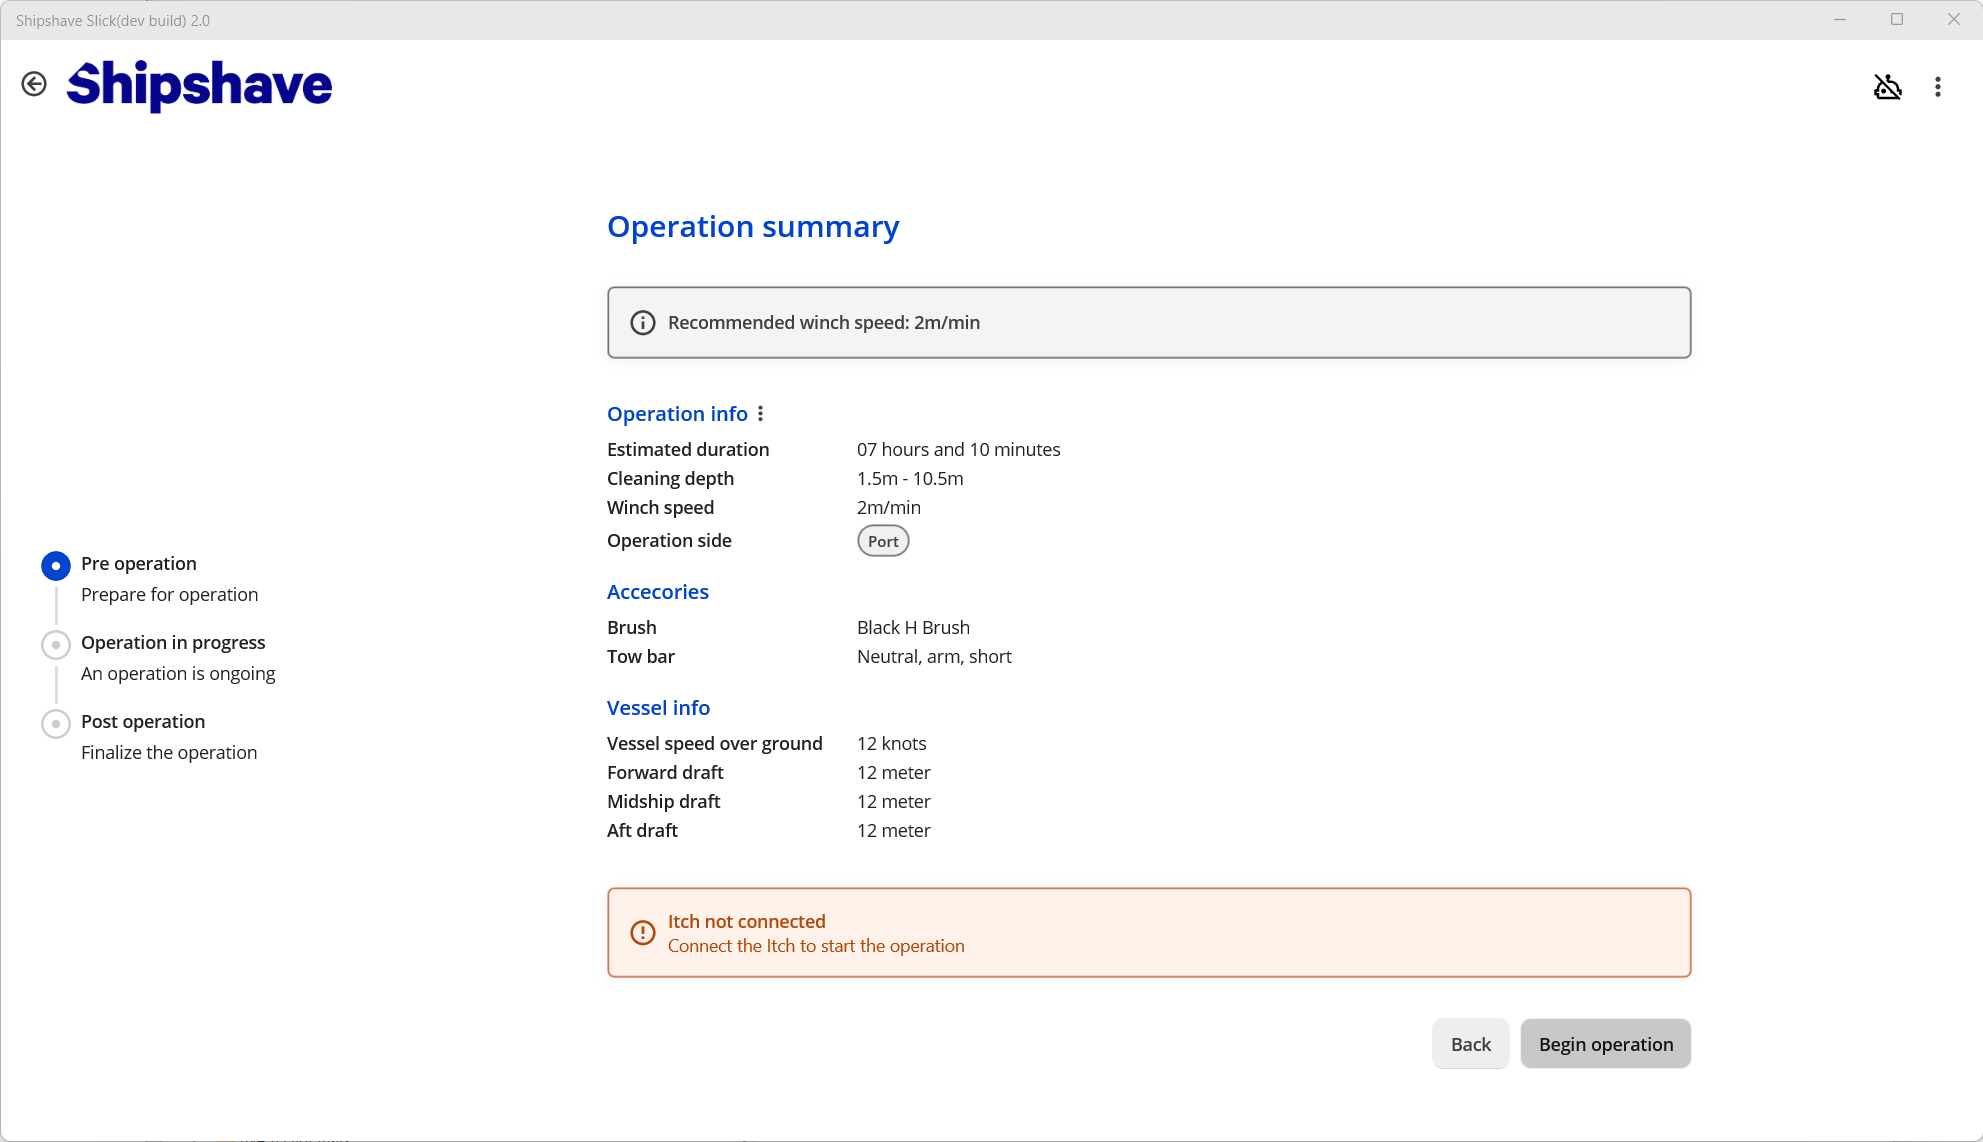
Before uploading the mission plan to the ITCH, a summary is presented. Here the user can see the expected duration of the operation as well as the depth-band where the ITCH will clean. A recommended winch speed is presented, based on the operational input and current state of the hull. A selection of chosen accessories and operational parameters are presented, the user must make sure that this corresponds with the actual conditions.
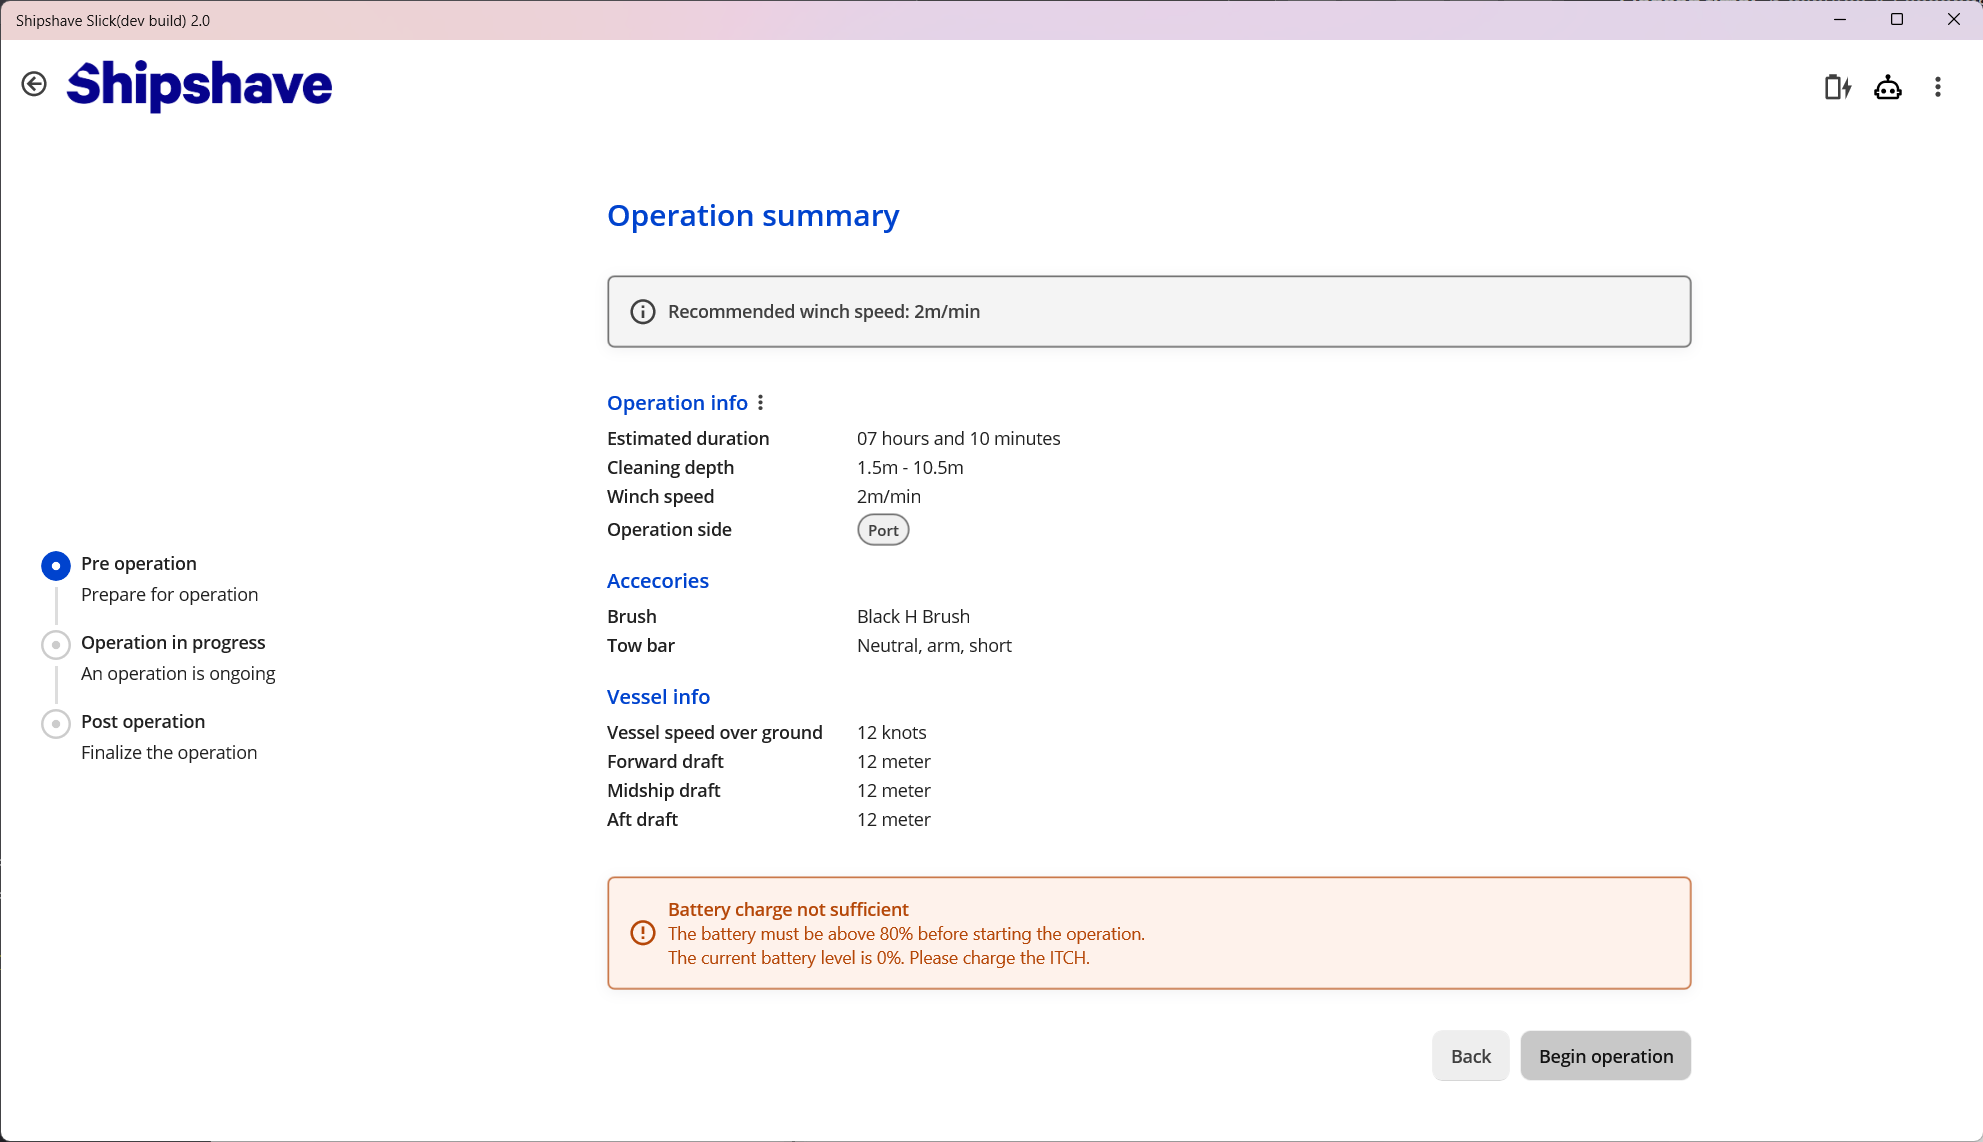
Before the "Begin Operation" button is enabled, an ITCH must be connected to Slick. It must also have sufficient battery level and available memory.
Overwriting automatic configuration (power-user functionality)

This will open a new page where the user can override certain parameters to upload to the ITCH.
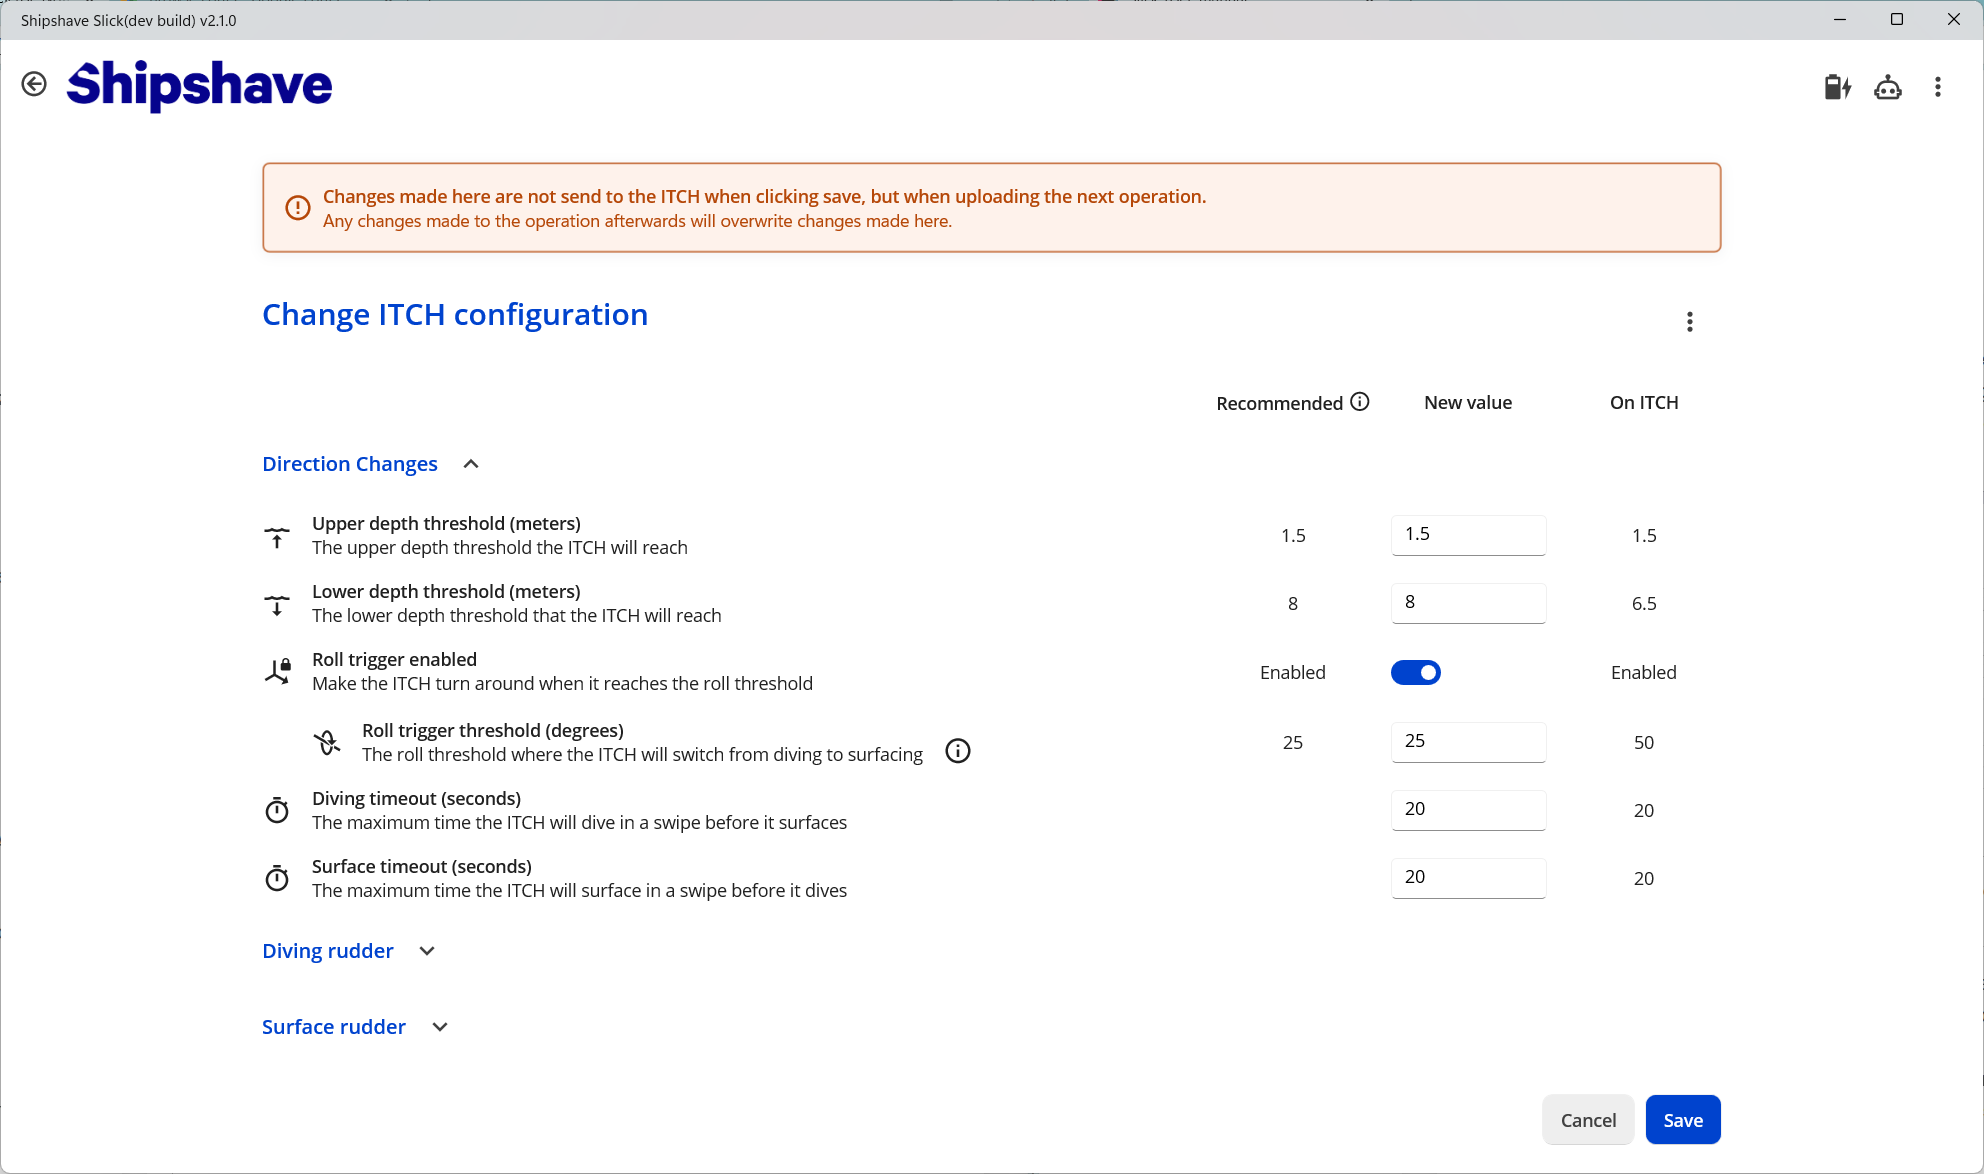
The parameters available for override are:
- Upper depth
- Lower depth
- Roll trigger enabled
- Roll trigger threshold
- Diving timeout
- Surface timeout
- Surface rudder, initial angle
- Surface rudder, maximum allowed angle
- Surface rudder, minimum allowed angle
- Surfacing turn-around kick on/off
- Diving rudder, initial angle
- Diving rudder, maximum allowed angle
- Diving rudder, minimum allowed angle
- Diving turn-around kick on/off
Press "Save" and then "Begin operation" in the "Operation Summary" page to make sure the correct values are uploaded to the ITCH.
Changes are only applied when the "Begin operation" button is pressed.
Once the setup is correct, the checklist is completed and the ITCH is ready to clean (battery, storage), the "Begin operation" button is enabled (blue color).
By pressing this button, the current configuration and mission plan will be uploaded to the ITCH. In most situations, the ITCH will pulse purple prior to pressing the button and it will turn solid green once the button is pressed. The user is then navigated to the "Operation in progress" page.
The cleaning operation can now begin. Disconnect the ITCH from the PC and deploy the ITCH and observe the operation per the user manual.
Operation in progress
During an operation, all functionality of Slick can be used, apart from starting a new operation on the same vessel. To start a new operation, the "In progress" operation must be completed.
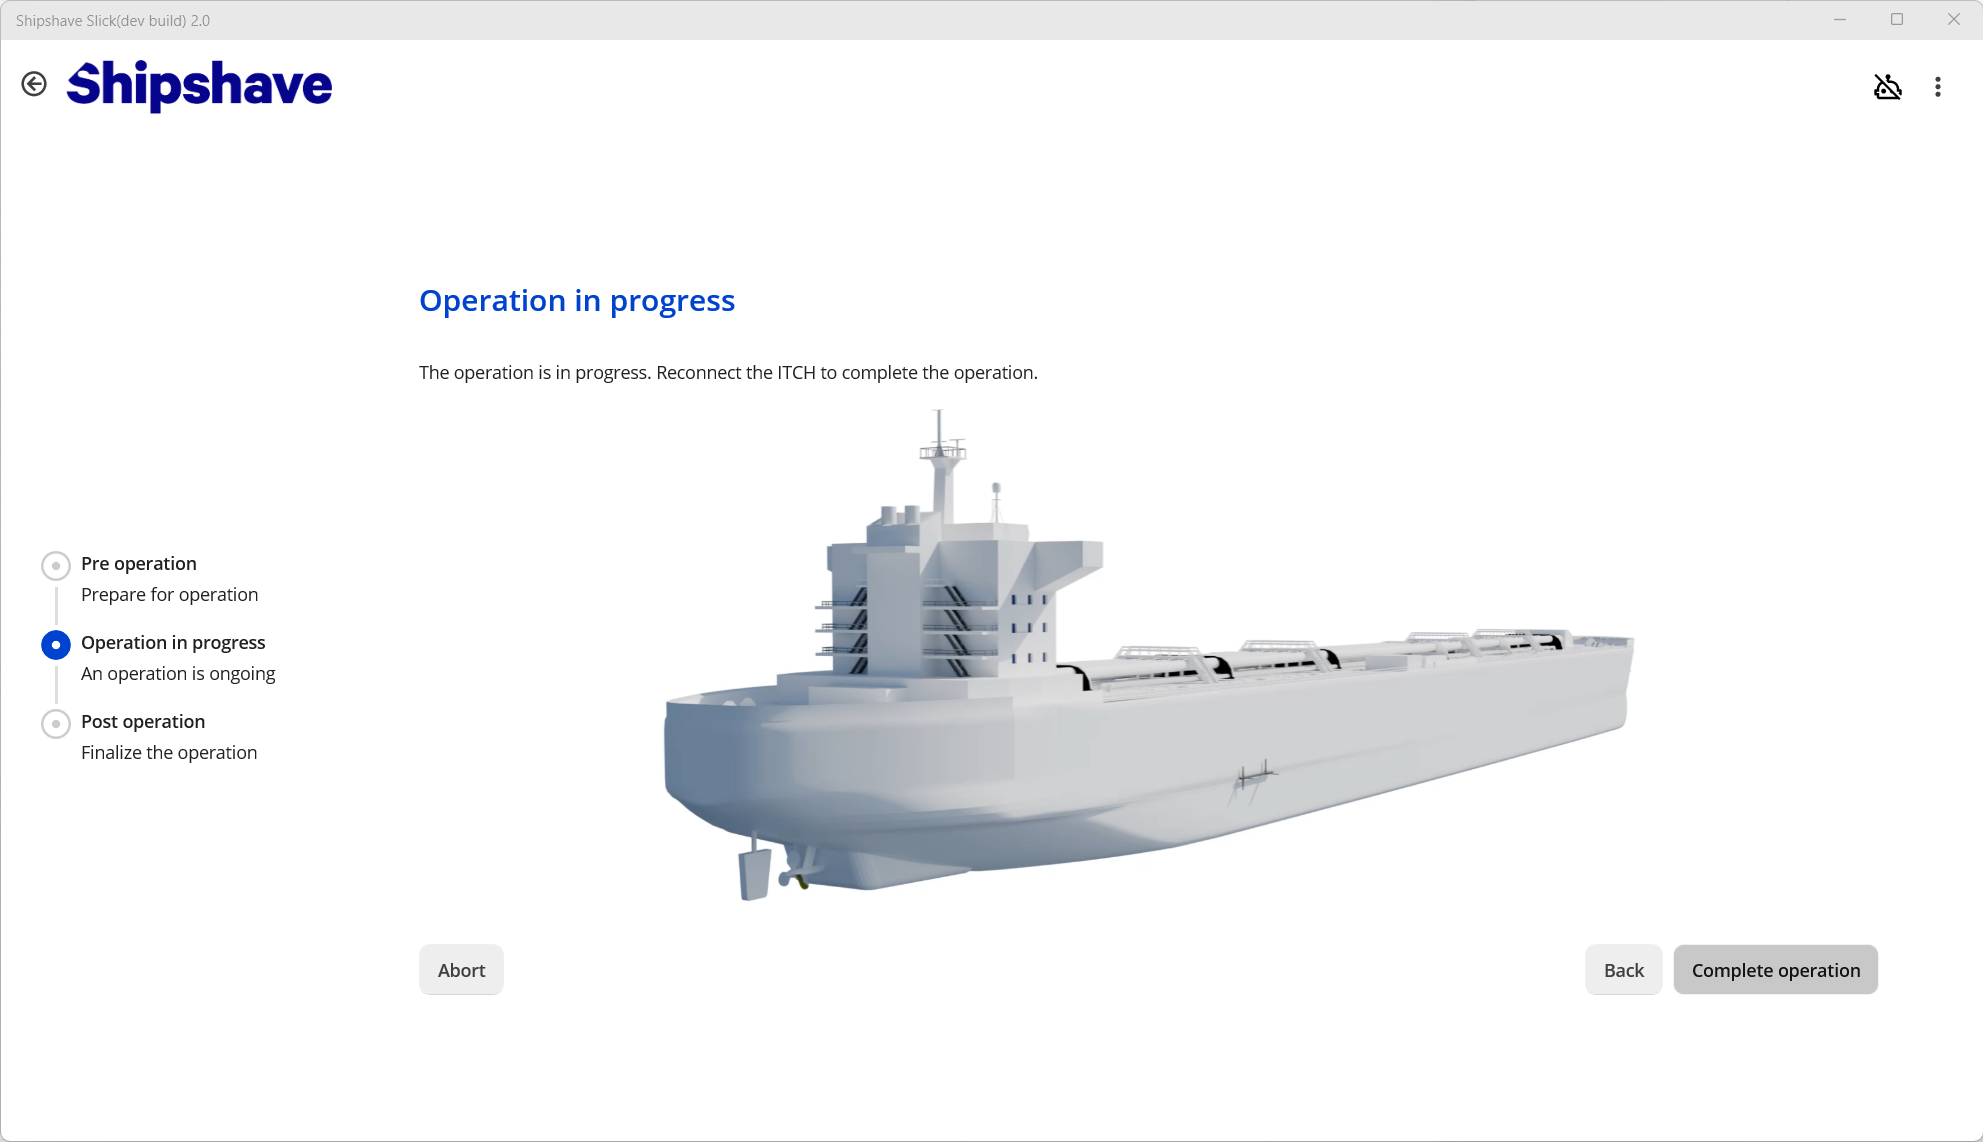
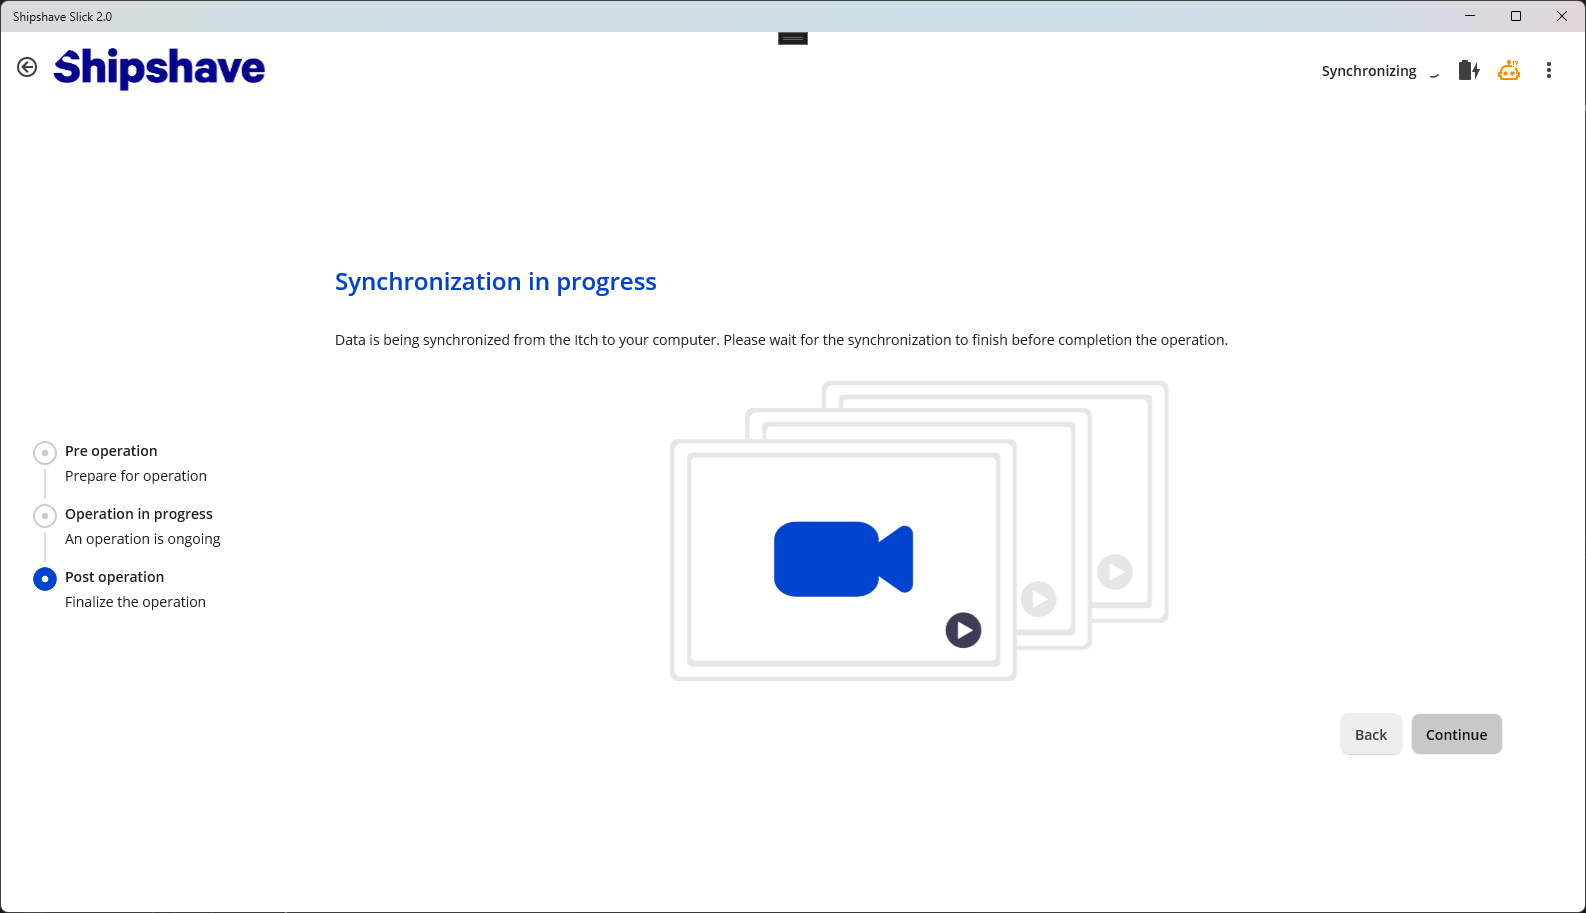
To complete the cleaning, the ITCH must be reconnected to Slick. Slick will automatically start the synchronization of the resulting dive operation that is stored on the ITCH ( videos, logs etc.) into Slick.
Once synchronization has started, the user is allowed to continue the post-operation process. The "Complete operation" button will turn blue, and a "Synchronizing" indicator will appear in the application menu-bar (top-right corner).
Aborting an operation (last resort)
The option to abort an operation should only be used if the ITCH is lost or unusable. Any other cases where data-recovery is possible, should complete the operation in the normal way. This also applies to cases where the "physical operation" is aborted (eg because of weather), but the data generated on the ITCH is available.
The operation will appear in the vessel history marked as aborted.
Post-cleaning report

Once file-synchronization has started, the user must fill in data regarding the cleaning operation. The data should reflect the actual conditions during the cleaning operation (whereas in the setup stage the data entered is planned/forecasted). Weather data required should be an average over the time-period of the ITCH operation.
The data that is required is:
- Actual winch speed
- Vessel speed over ground
- Vessel speed through water
- Vessel heading (average)
- Wave height (average)
- Wave direction (average)
- Wind speed (average)
- Wind direction (average)
Awaiting file sync
In order to complete the cleaning operation, the file synchronization must be completed. The user is expected to set a value for the cleanliness of the hull, and in order to do so they must evaluate the video. There is an option to "evaluate later" to resume operations once all files has been transferred, but not post-processed. Once the file-transfer part of the file-synchronization process is completed, the ITCH can be disconnected and e.g. put to charge.
Evaluate operation
Once the file-synchronization is completed, the user must assess the post-cleaning state of the hull in order to complete the operation. This is done by assessing the video, and setting a score for the hull.
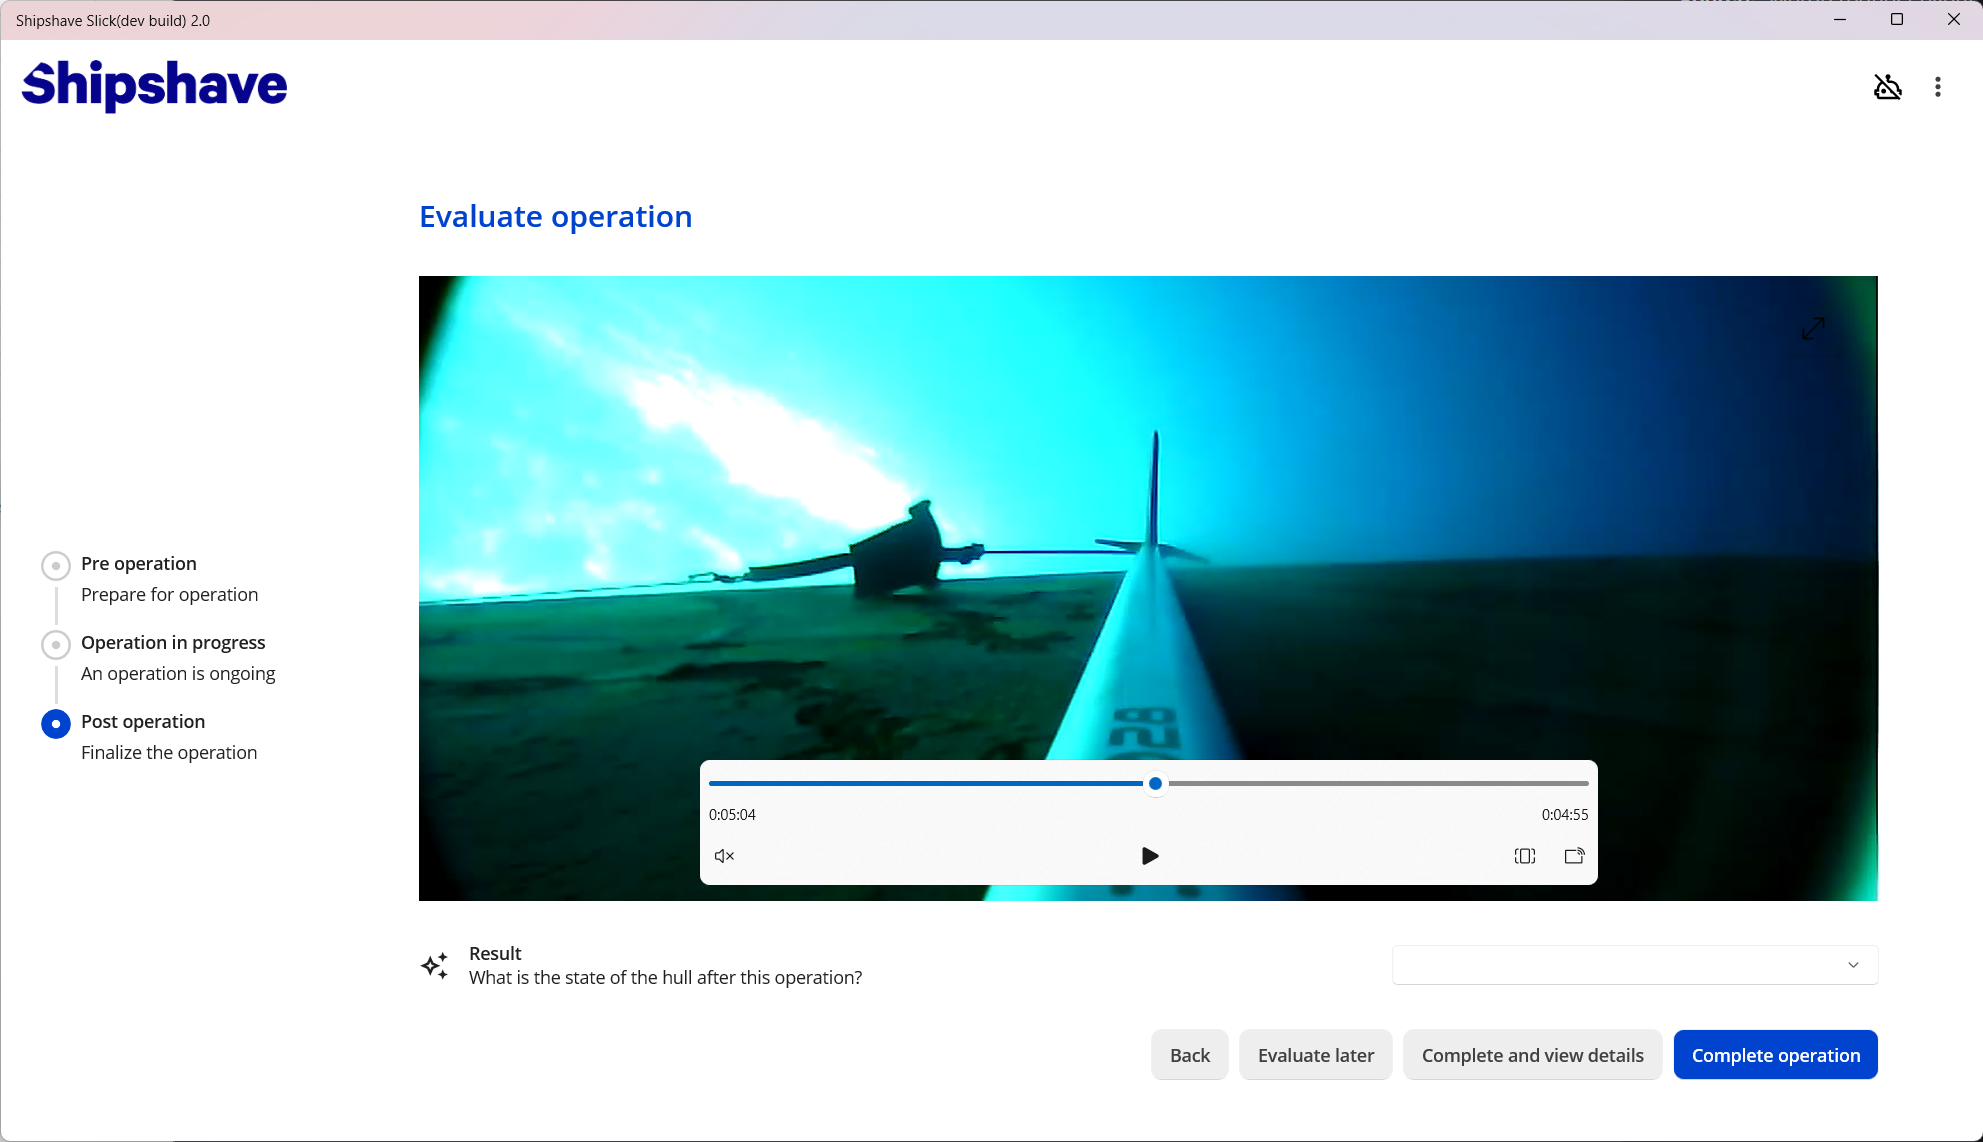
The option to "Evaluate later" will tag the cleaning operation with this, and allow the user to push the evaluation process to later (or to others). A new cleaning operation can be started once the "Evaluate later" option is selected for the current cleaning.
The option to "Complete and view details" will set the current state of the hull and take the user to the Cleaning Analysis section. More in-depth analysis of the cleaning operation and registering times-of-interests can be done here.
"Complete operation" will set the current state of the hull and take the user back to the Vessel Home page.
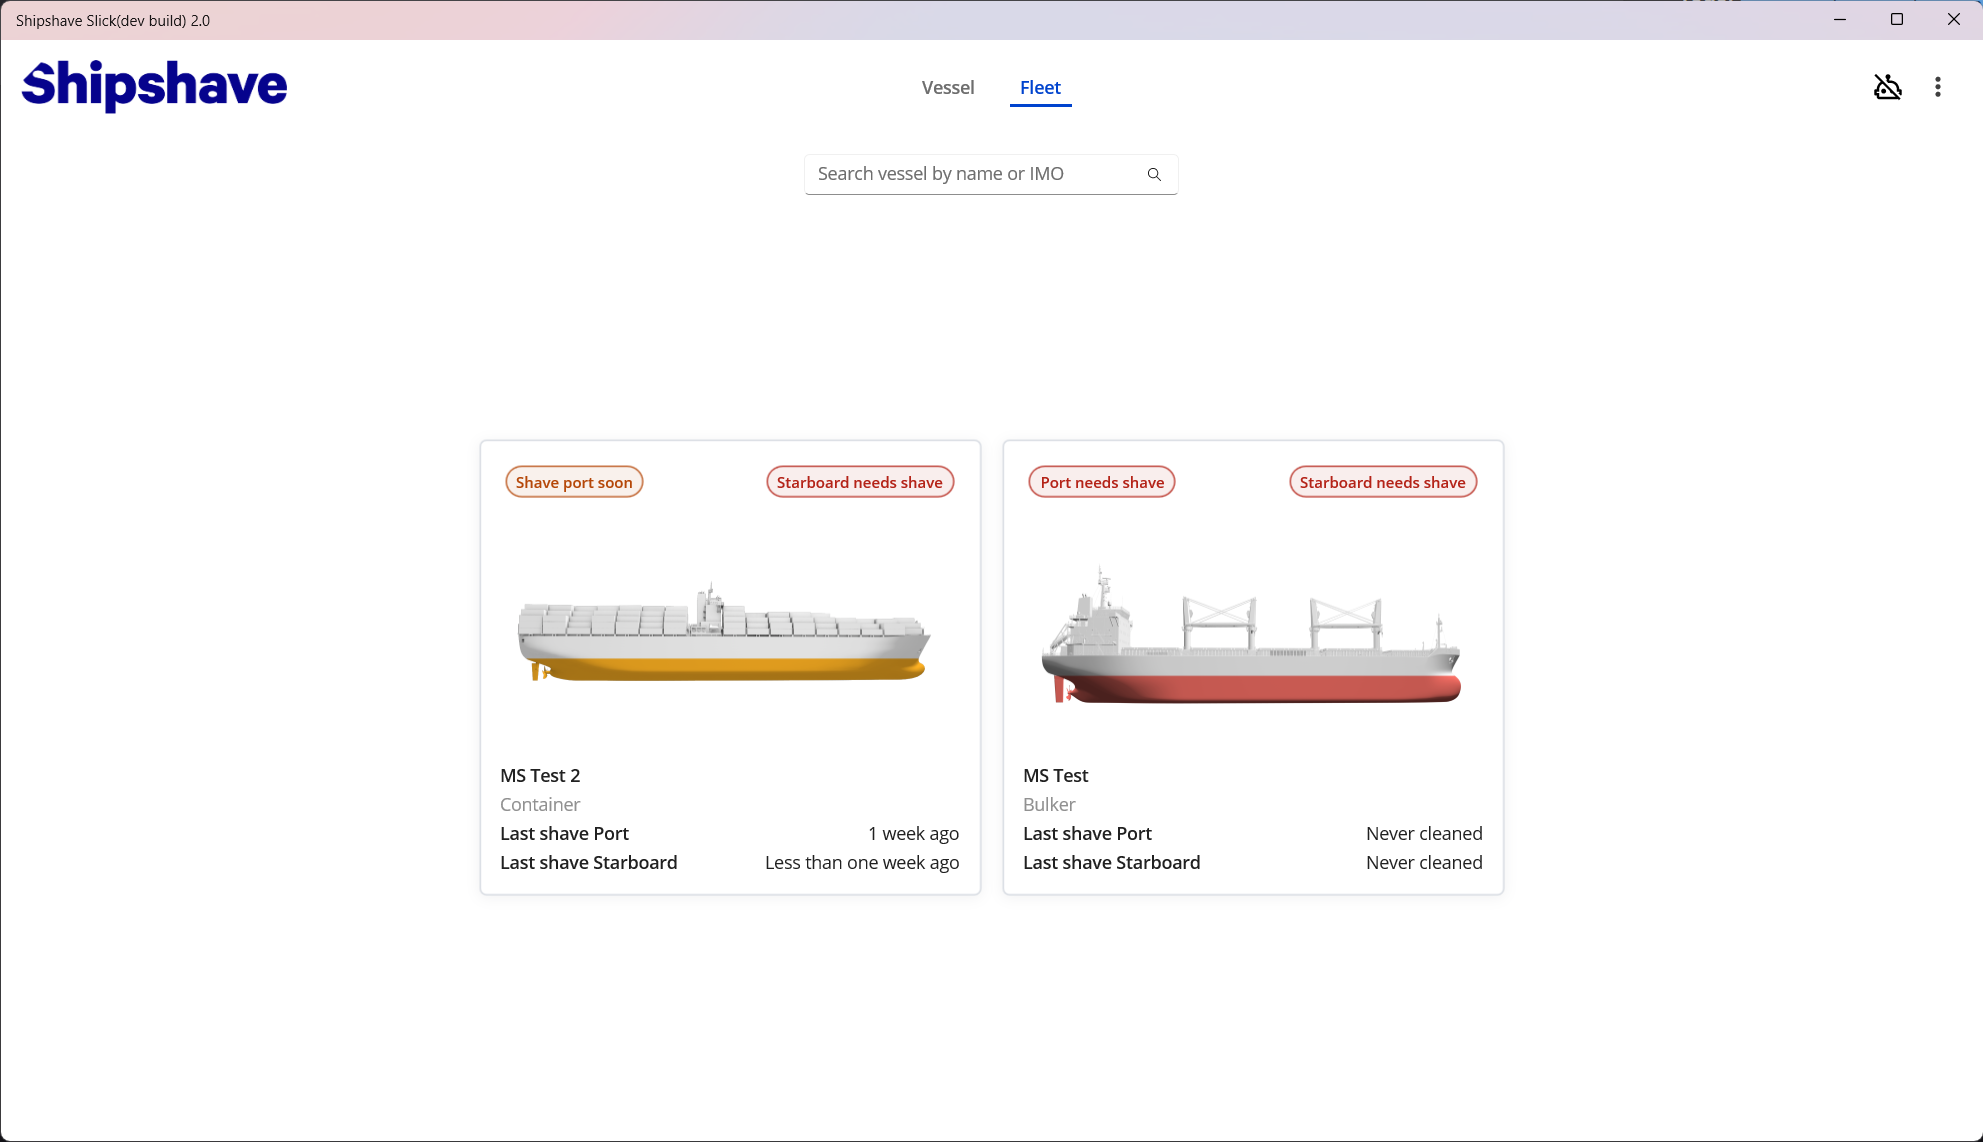
Fleet
From the vessel home page, the user can enter the "Fleet" section of the application. This is intended for users managing multiple vessels with ITCH onboard. This page has a search bar for filtering vessels based on either vessel name or IMO number.
The three-dot menu in the menu-bar (top-right) has some additional features for managing the fleet. These are:
- Add new vessel (will open the Vessel setup wizard)
- Import vessel from file (add a new vessel to the fleet from a .slickvessel file)
Each vessel also has a three-dot menu which is visible when hovering the vessel card. This allows the user to:
- Export vessel to file (generates a .slickvessel file that can be shared)
- Edit vessel (edit the parameters entered in the Vessel setup wizard for the specific vessel)
By clicking a specific vessel, the user will navigate to the cleaning operations overview for that vessel.
Adding a new vessel
Video tutorial
A fleet can consist of multiple vessels. The user can add a new vessel to the fleet by pressing the "Add new vessel" button from the dropdown menu in the menu-bar (top-right) (This will open the Vessel setup wizard) or by clicking " Import a vessel from file".
See setting up a vessel for more information on how to set up a vessel.
Cleaning operations
This page lists all historical cleaning operations for a vessel. The vessel context can quickly be changed to another vessel in the fleet by the dropdown on the right. The options to export or edit the current vessel are available here as well, by hovering the vessel card.

The list on the bottom of the page summarizes all operations performed on the selected vessel. The user can navigate to Cleaning Analysis by clicking an entry in the list if the "Cleaning Status" is "Completed" or "Evaluate later". The three-dot menu in the top-right corner of the list allows the user some more actions on one or multiple cleanings. Selection is done by checking the checkbox to the left in each entry. The options are:
- Import cleaning (import a cleaning operation to the current vessel from a .slickcleaning file, always available)
- Export cleaning(s) (export one or more cleanings to a .slickcleaning file, one or more cleanings selected)
- Generate PDF report (generate a PDF report for one or more cleanings, one or more cleanings selected)
Cleaning analysis
Video tutorial
The user is able to analyze the ITCH operation more in-depth using the tools available.
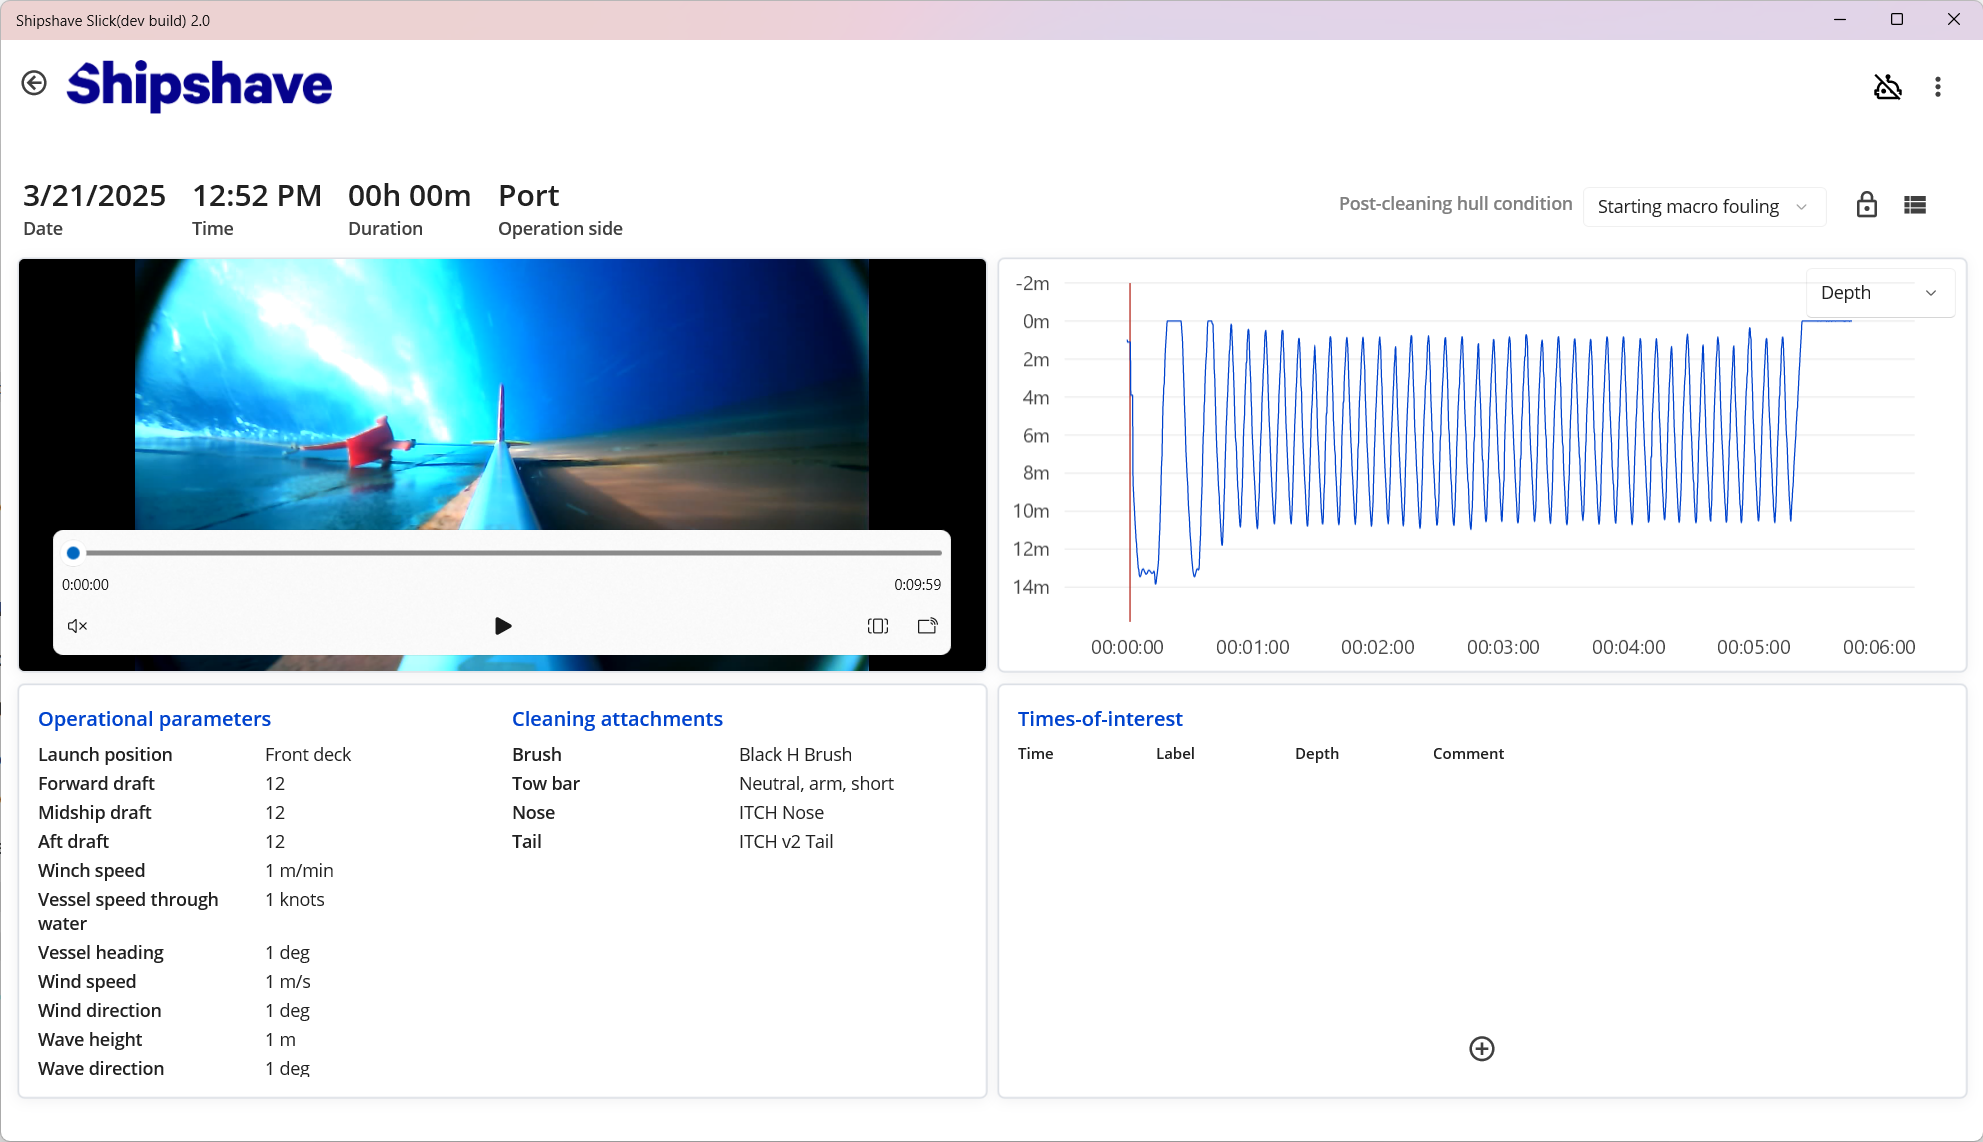
The video and graph are linked, and can be navigated by either the seeker in the video viewer, or the red seeker in the graph viewer. Different log-fields can be shown in the graph view by selecting the appropriate field in the drop-down. Depth is default field.
Key-parameters of the operation is listed in the bottom-left box, to provide insight and facilitate operational performance analysis.
The three-dot menu in the menu-bar (top-right) exposes the options to export the cleaning to file or generate a PDF report, as in Cleaning operations.
Times of Interests
The bottom-right box shows a list of all noted times-of-interest for the cleaning operation. A Time-of-Interest (ToI) acts as a summary point, for identifying interesting events during the cleaning operation. Users can add observations by adding a new ToI. By pausing the video (or selecting the appropriate time with the seekers) and pressing the "+" icon, a Time-of-Interest can be generated at the specific time.

The user must select a label for the ToI, depending on the nature of the event. The system-available labels are:
- Concern (event serves as cause for concern, e.g. damage to coating)
- Incident (event marks an unwanted incident, e.g. ITCH colliding with bilge-keel)
- Note (event marks a general note, e.g. winch direction changed)
- Observation (event marks an observation, e.g. visible barnacles)
The user can also add a general comment, describing the ToI with their own words. The ToI will be linked to the cleaning and stored. It references time-into-operation and depth where the event occurred directly.
The ToI's serve as a great way to summarize findings during an ITCH operation. They are available in the system, and will follow the export of a cleaning operation. The user can also navigate the data and video by the ToI's. Pressing a ToI entry in the list, will put the seeker in both the video and the graph to the specified time. That means the crew can enter their observations as ToI's before sharing the operation with onshore personnel through a .slickcleaning export.
The onshore personnel will then get access to the full list of ToI's when importing the cleaning and can therefore quickly understand the state of the hull and the progress of the cleaning operation.
The ToI's are also exported in the PDF report, with the label, time, depth and comment as well as a snapshot from the video at the specified time. That means the reports are more insightful if the usage of the ToI's is good, prior to generating the report.
Post-cleaning hull condition
The user is able to change the assessed post-cleaning hull condition that was set during completion of the cleaning operation. There might be cases where the initial assessment was wrong, and a more in-depth analysis at a later stage provides more insight.
In order to do this, the user must "unlock" the status by pressing the padlock icon. The dropdown will then be enabled and the user can set the correct state. For cleaning operations where "Evaluate later" was selected, the padlock is unlocked by default and the user is urged to set a post-cleaning hull-status.
Export / import
Exporting a vessel
Video tutorial
A vessel can be exported from multiple places in the application (an option under three-dot menus). The user must then select a location in the file-system to save the generated file. Once a folder is selected, Slick will start a background-job packing the vessel information into a shareable format. An indicator will appear in the menu-bar whilst the job is ongoing. An alert-dialog will appear on completion of the job, telling the user where the file can be found. The file will always follow the naming scheme
<vessel_name>.slickvessel
The resulting .slickvessel file is compressed and encrypted and can only be opened by Slick. That means the contained information is safe to share. The filesize is around 6KB, making it ideal for sharing over email (or low-bandwidth links).
Importing a vessel
Video tutorial
A vessel can be imported from multiple places in the application (an option under three-dot menus or during initial vessel setup). The user must then select a .slickvessel file that contains the vessel data. This can be dragged-and-dropped into Slick or browsed to in the filesystem.
Once a file is selected, Slick will start a background-job unpacking the vessel information and putting it into the system. An indicator will appear in the menu-bar whilst the job is ongoing. An alert-dialog will appear on completion of the job.
The vessel will be added to the current fleet.
Exporting one or more cleaning operations
Video tutorial
A cleaning operation can be exported from multiple places in the application (an option under three-dot menus). The user must then select a location in the file-system to save the generated file, and then choose whether to include the video or not.
Omitting the videos will significantly reduce the file-size (MBs vs GBs), and is ideal for sharing quick insights over low-bandwidth connections. The cleaning operation can be re-shared later, with the videos included.
Once a folder is selected, Slick will start a background-job packing the cleaning operation information into a shareable format. An indicator will appear in the menu-bar whilst the job is ongoing. The duration of the job can be significant for long operations, with video included. An alert-dialog will appear on completion of the job, telling the user where the file can be found. The file will always follow the naming scheme:
<vessel_name>_CleaningExport_<DateAndTimeOfExport>.slickcleaning
The resulting .slickcleaning file is compressed and encrypted and can only be opened by Slick. That means the contained information is safe to share. The filesize will vary depending on the length of the operation, and whether the video is included or not.
Multiple cleaning operations can be combined into one .slickcleaning file. This is done by selecting multiple operations in the list, before pressing export. Note that the filesize can be excessive for multiple operations and the export job duration might be very long.
Exported files can have a large file size (>10Gb). Make sure that the storage device you are exporting to has enough space to store the file and uses a file-system that supports large files like NTFS when the file is larger than 4Gb.
Importing one or more cleaning operations
Video tutorial
A cleaning operation can be imported from multiple places in the application (an option under three-dot menus).
The user must then select a .slickcleaning file that contains the cleaning operation(s) data. This can be dragged-and-dropped into Slick or browsed to in the filesystem.
Once a file is selected, Slick will start a background-job unpacking the cleaning operation information and putting it into the system. An indicator will appear in the menu-bar whilst the job is ongoing. For .slickcleaning files including videos this might take some time. An alert-dialog will appear on completion of the job.
The cleaning will be added to the correct vessel as indicated in the .slickcleaning file. The vessel must exist in the current fleet in order to import the cleaning.
Generate PDF report
Video tutorial
A pdf report can be generated to summarize the cleaning operation. This report is in a generic format and includes operational parameters as well as graphs of depth and roll. 8 images are generated from the video, spread out over the duration of the cleaning. The times-of-interests are summarized in a table.
The report can be generated from multiple places in the application (an option under three-dot menus). When invoked, the user must select a location to store the resulting report(s). After the folder is selected, Slick will start a background job preparing the report. An indicator will appear in the menubar. The job-duration will depend on the length of the cleaning operation.
Once the job finishes, the user is prompted with an option to show the created file in File Explorer.
The generated report will always follow the naming scheme:
ITCH Report-<vessel_name>\[\<SideOfOperation>\]_\<DateAndTimeOfOperation>.pdf
Menubar
All pages in Slick feature a menubar in the top part of the window. This enables navigation between pages and access to the settings page, as well as other page-specific options. It also features a status indication for background jobs as well as a connection indicator for the ITCH robot. The settings page is always available from the menubar, and navigating back from a page is done by pressing the arrow icon in the top-left corner.
ITCH connection status
The robot-icon specifies the connection state of the ITCH robot.
| Icon | Connection status | Icon right-click |
|---|---|---|
| No ITCH connected | NA | |
| ITCH connected | ITCH robot options | |
 | ITCH connected, no communication | NA |
| ITCH connected in firmware update mode | Update firmware | |
| ITCH connected, robot in error mode | Show error info |
Firmware update
Slick can be used to update the firmware on the ITCH. It is important to always update to the latest available firmware to get the best performance out of your ITCH.
Checking for firmware updates
Upon connection with an ITCH, Slick will check the firmware currently on the ITCH and advises a firmware update if one is available. If so, Slick will ask the user to enable firmware update mode on the ITCH to start the update process.
Enable firmware update mode
To enable firmware update mode on the ITCH:
- Disconnect the USB cable (if connected) and power off the ITCH
- Power on the ITCH and hold the power button slider until the status LED turns blue
- Connect the USB cable to the ITCH
Update firmware
When connecting an ITCH that is in firmware update mode, Slick will automatically open the firmware update menu. (The firmware update menu can also be opened by clicking the blue robot icon).
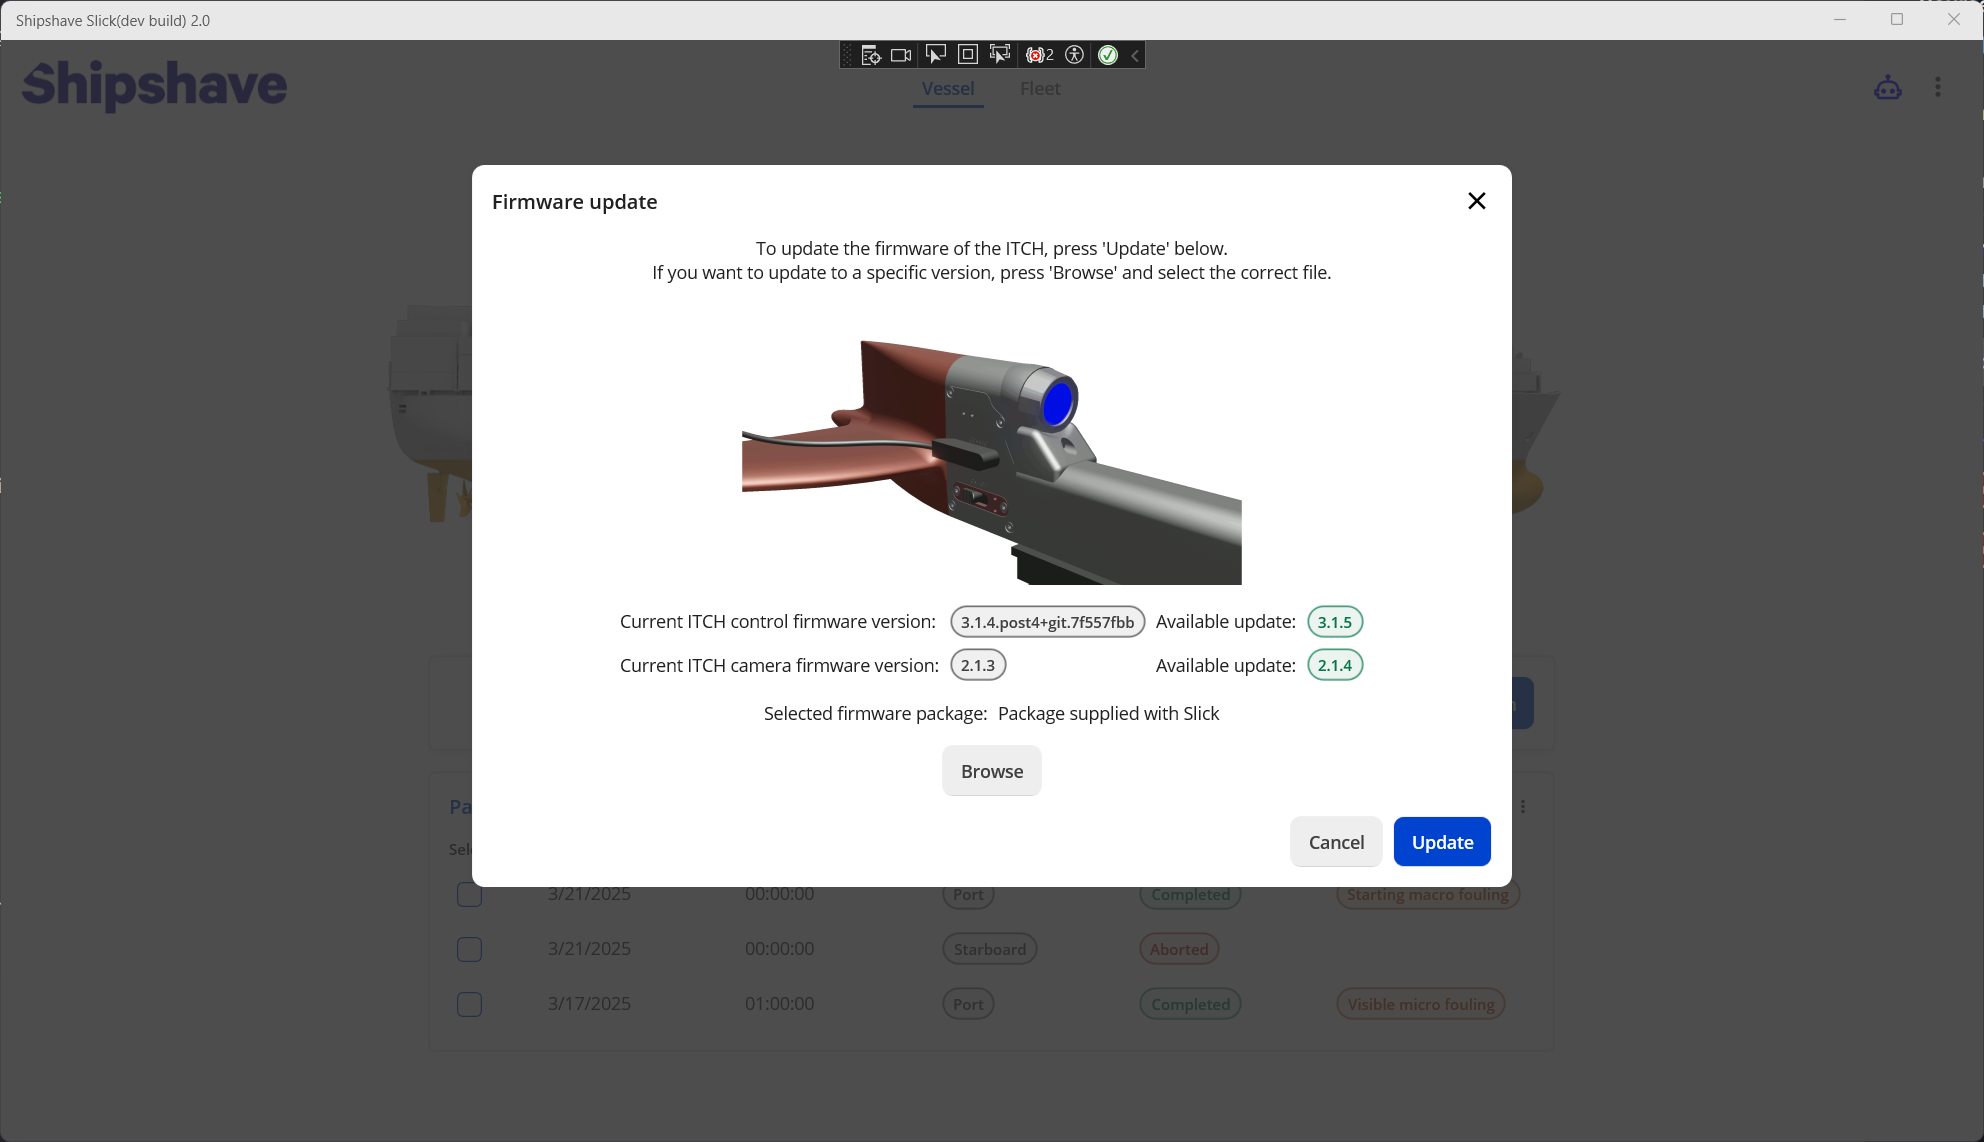
The firmware update menu shows information about the current firmware on the ITCH and the available firmware update. By default, Slick will select the firmware that is integrated in the version of Slick that is currently installed. This version is always compatible with the current version of Slick. It is possible to select a different version of the firmware to update to. See Custom firmware for more information.
The color-coding of the "Available update" indicates wether it is an upgrade or not.
| Color | Description |
|---|---|
| Green | Newer firmware available |
| Gray | Identical version already installed |
| Red | ITCH has newer firmware than what is available |
By pressing "Update" the firmware update process begins.
Keep the ITCH connected until the update process is complete. Disconnecting during update can lead to undefined behavior.
Custom firmware
To install other firmware, select "Browse" and select an appropriate firmware update package. These are available from https://support.shipshave.no/
File Synchronization
Once Slick detects the connection of an ITCH, it will start a background job checking if new cleaning operation data is available on the ITCH. If it finds data on the ITCH that does not correspond with its operation history, it will prompt the user.
If it finds data that corresponds to an ongoing cleaning, it will start the file synchronization progress. This process can take some time depending on the duration of the cleaning operation and the computer Slick is installed on.
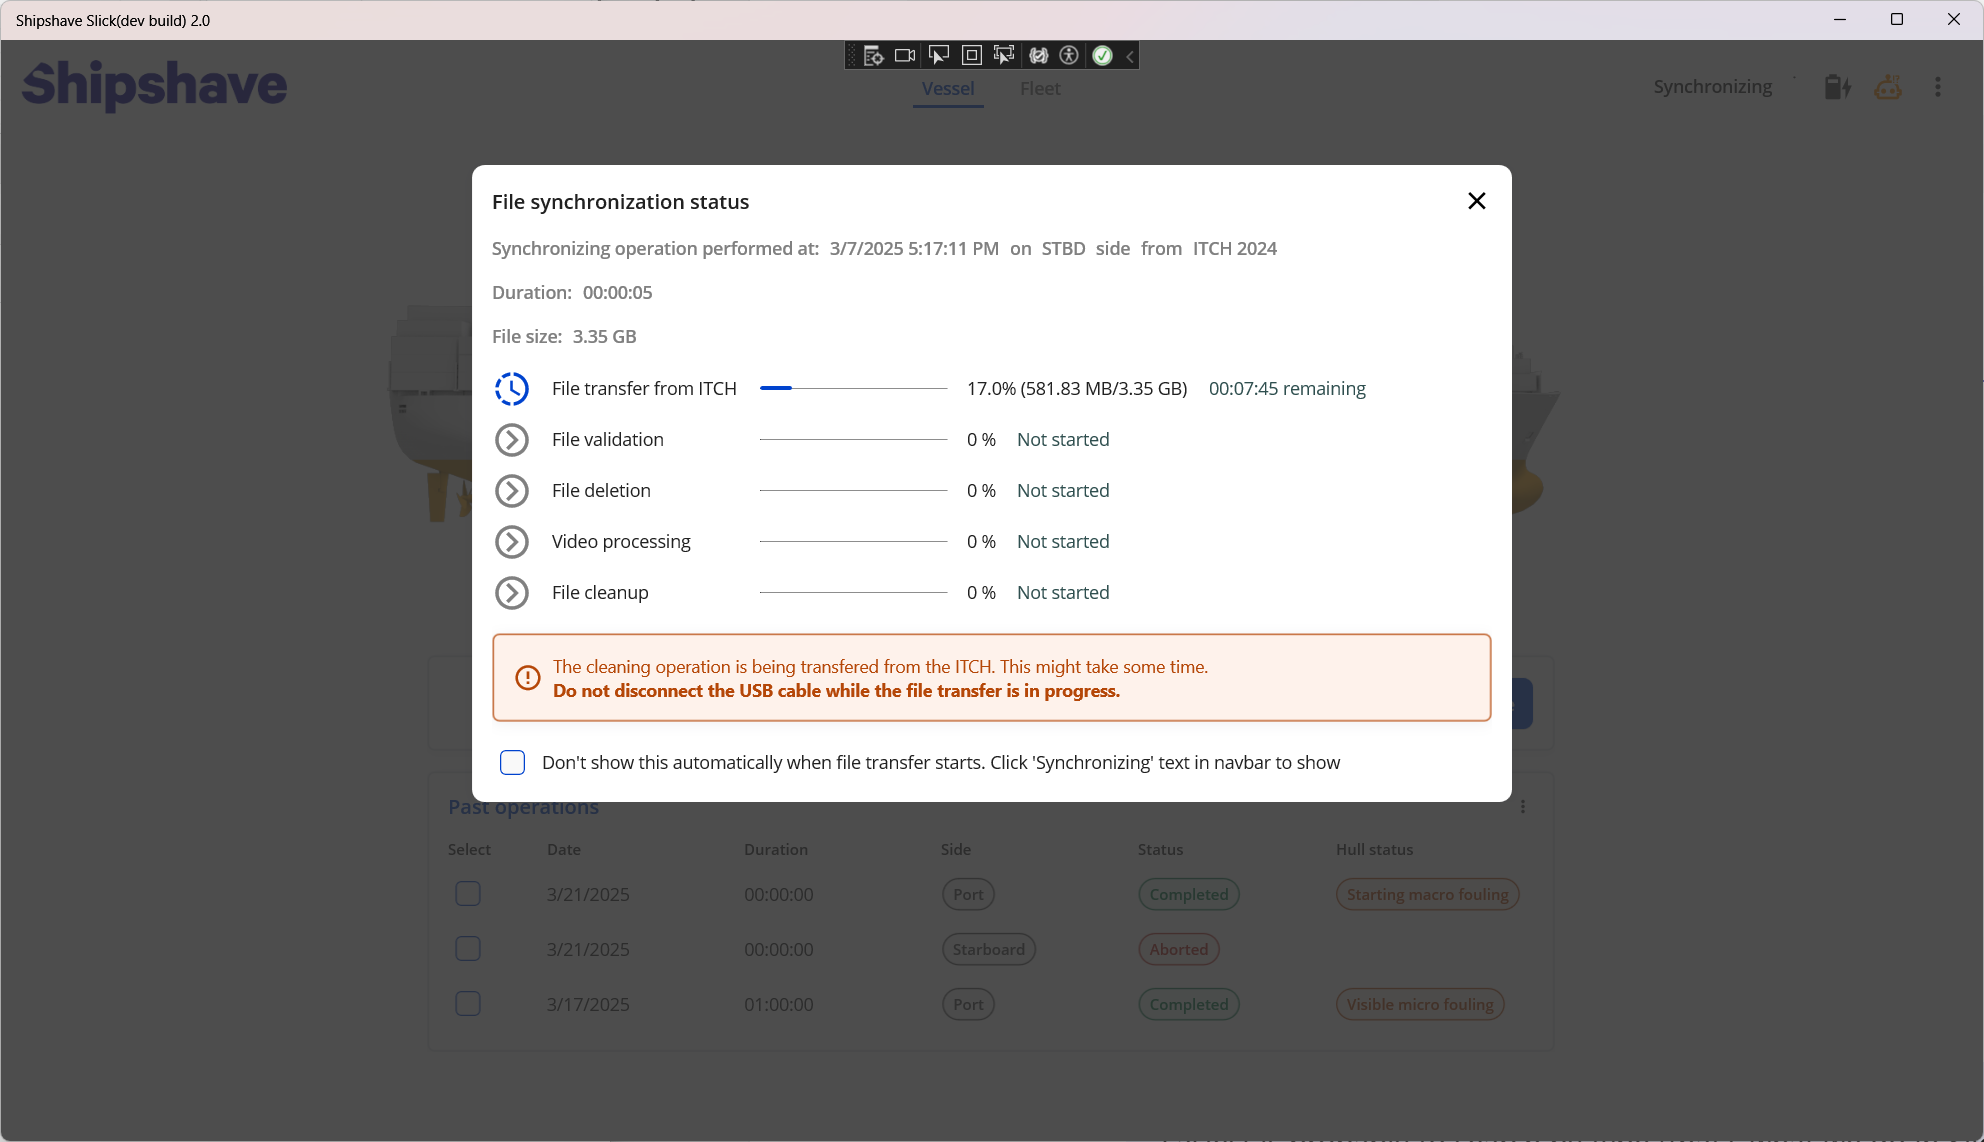
The file synchronization process is divided in steps, which has varying duration
| Step | Description | Typical duration |
|---|---|---|
| File transfer | Transfer files from the ITCH to the computer | 6-7 minutes pr. hour of operation |
| File validation | Check the integrity of the transferred files | < 1 minute pr. hour of operation |
| File deletion* | Delete the transferred files from the ITCH | 1-2 minutes pr. hour of operation |
| Processing** | Process the transferred data | 10-15 minutes pr. hour of operation |
| Clean up | Delete temporary files and move to permanent storage | < 1 minute pr. hour of operation |
* Can be skipped in settings. This will keep the files on the ITCH.
** Can be skipped in setting. If skipped, viewing the videos in Slick is not possible. This step reduces required storage size by approximately half. Performance highly computer-dependent.
Total file synchronization time is approximately 15-25 minutes pr. hour of operation. This is highly dependent on the computer the ITCH is installed on.
Keeping the ITCH connected
During file transfer it is important that the connection between the computer and ITCH is left intact. Do not disconnect the ITCH during file transfer. After the "File deletion" step, the ITCH can be disconnected.
Viewing progress
During file-synchronization, an indicator will show that the process in ongoing in the menubar. By hovering the mouse-cursor over the indicator, the user can get a quick feedback on the progress. By clicking it, the user can see more comprehensive synchronization progress.
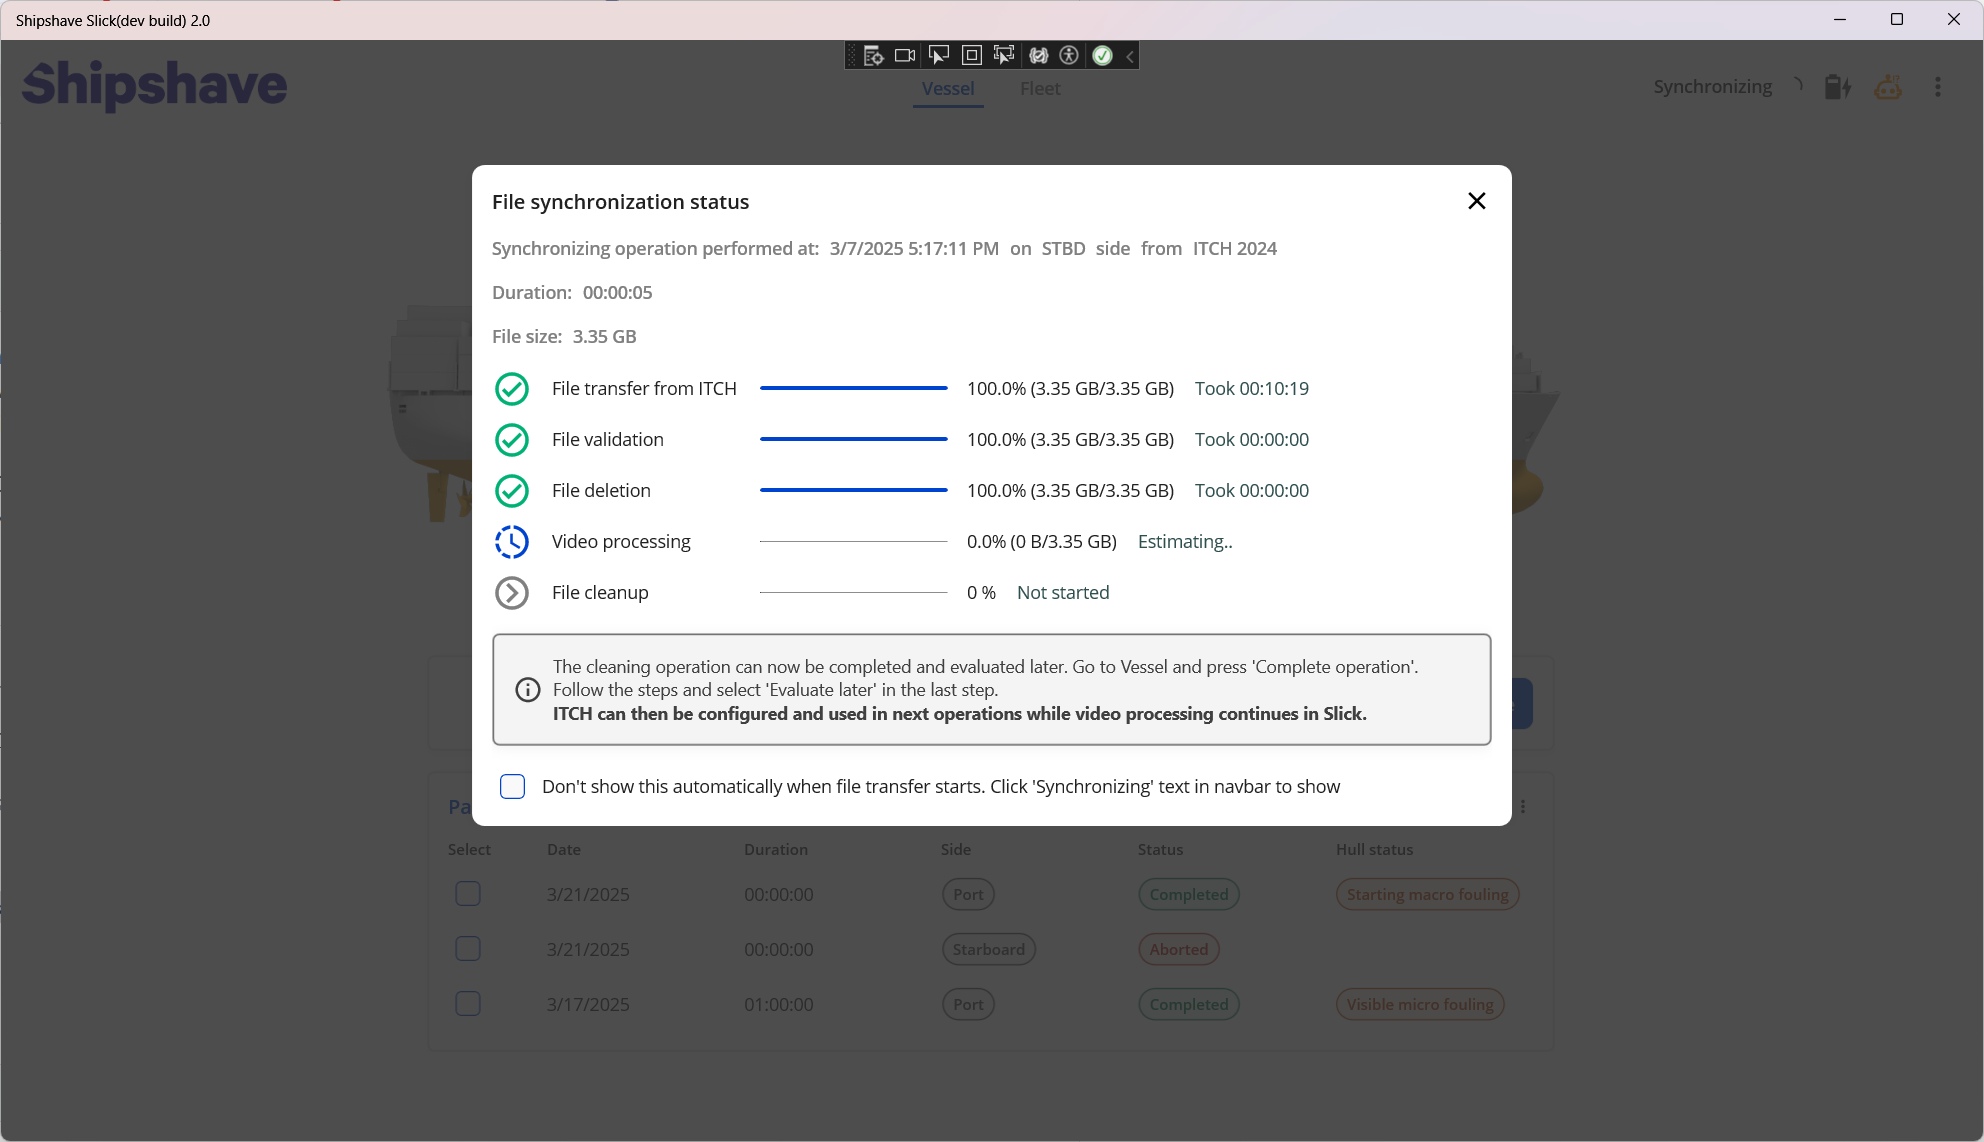
Continue operating the ITCH
Once the "File deletion" step is completed, the user can complete the ongoing evaluation by selecting "Evaluate later" in the post-operation wizard. This will allow a new cleaning operation to be configured while the rest of the synchronization runs in the background.
Settings
The settings page exposes some parameters that changes the behavior of the Slick app.
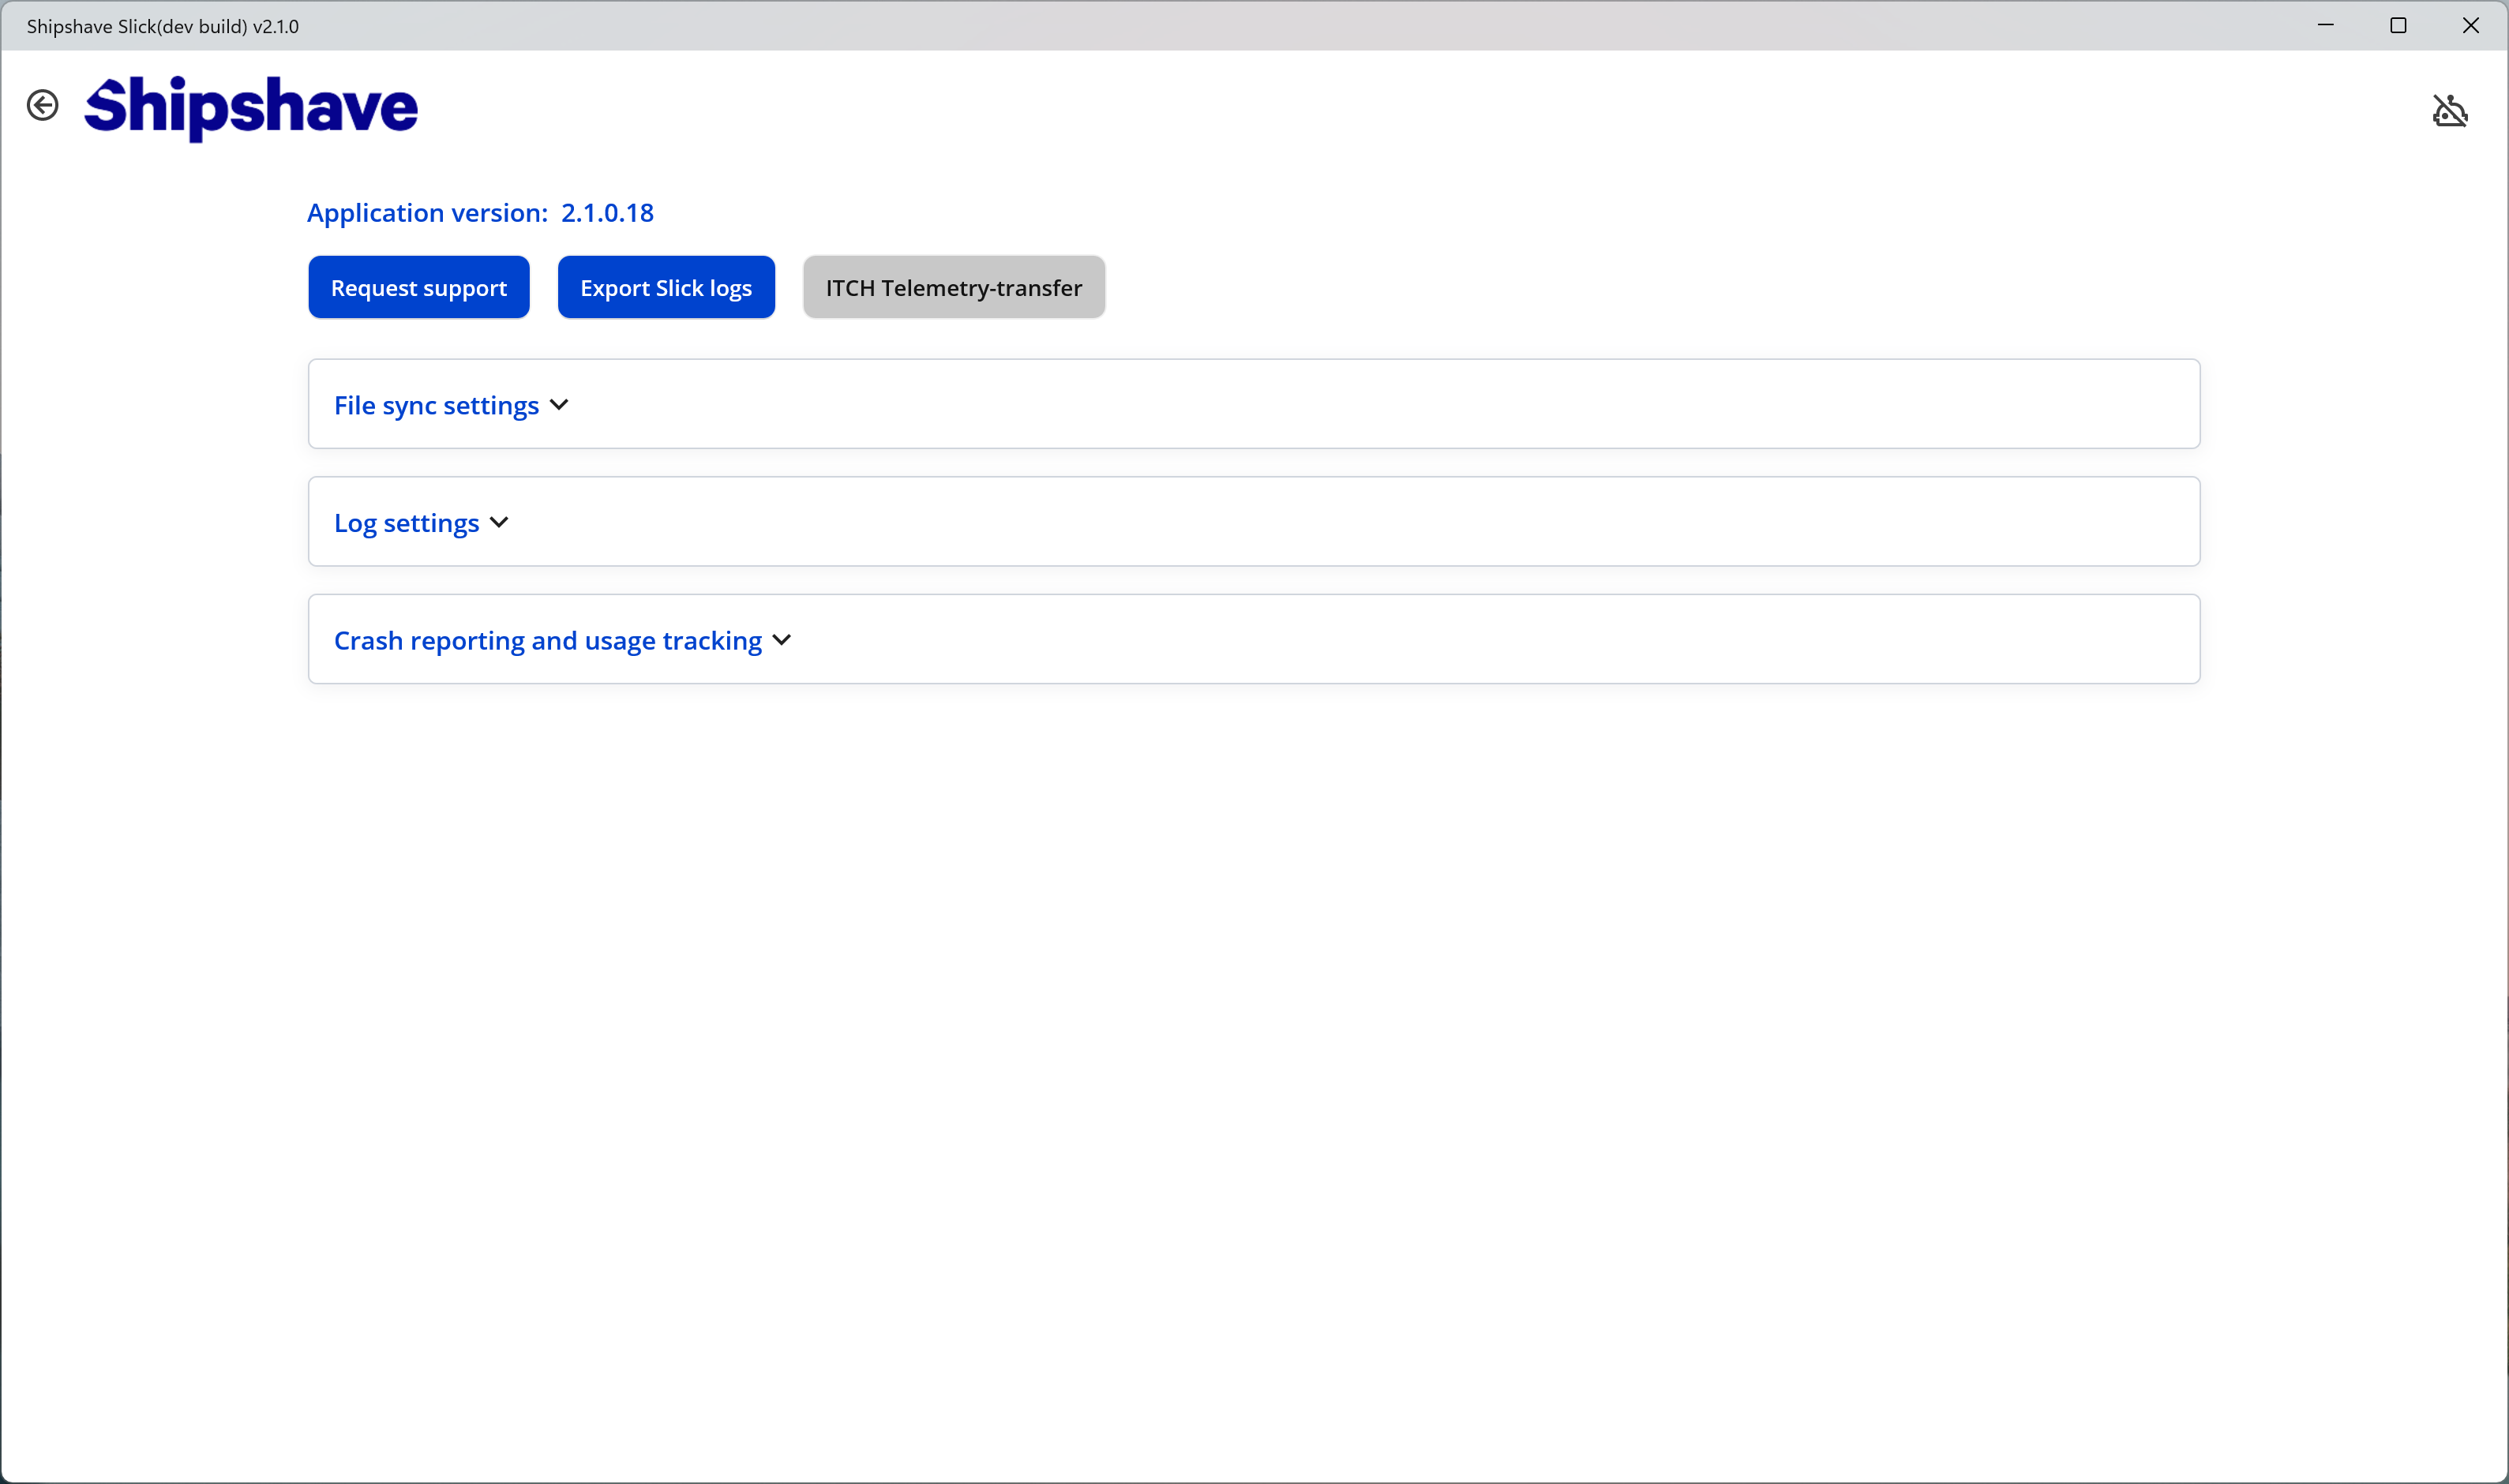
The top action buttons has the following functions.
| Request support | Generates an email template to support@shipshave.no with the application logs attached. For support queries regarding Slick, this should be used as a template creator where more in-depth info can be filled in. Opens the default email client on the computer. |
| Export Slick logs | Zips and exports the application logs to Documents |
| ITCH Telemetry-transfer | Initiates a forced transfer of telemetry on the ITCH. An ITCH must be connected for this option to be enabled. Note that the firmware will handle most cases where this was feature was required in previous versions. |
The other settings allow the user to turn on/off various features. It is recommended to keep the usage tracking options on, as it will significantly improve product quality and specific troubleshooting cases.
Developer Mode
To enable developer mode, press the "Application version" label 5 times and follow the instructions from there.